Adding VMware VMs to GNS3 Topologies
Introduction
This document explains how to add VMware virtual machines to GNS3 topologies. Even though this document discusses the use of VMware virtual machines, you can do something similar using Virtualbox.
This document will show you two methods of adding a virtual machine to GNS3:
- Manually using a local install of GNS3
- Using an appliance and adding the VM to the GNS3 VM
We are not discussing the importing of the GNS3 VM in this document; but rather the addition of other virtual machines to GNS3 topologies which may be running in the GNS3 VM or running locally.
VMWare Limitations in GNS3
The data of the VMware VMs are stored outside GNS3. This mean a topology using a VMware VM will not be portable on a different computer. If you want a portable topology you will need to use Qemu.
You can’t run multiple instances of the same VMware VM if you are using VMware Player. You need a paid version of VMware to do that.
Limitation of VMware Player
The Player version of VMware has limitations and if your VM are not in the default directory sometimes GNS3 can’t locate the VM you created.
This problem doesn’t occur with the paid version of VMware because a central database is available to third parties applications.
Why use VMWare?
Some appliances are designed to only run in VMware. Also, there are times when you may simply prefer using a desktop VM (and the GUI applications it can provide), instead of using the serial console to work with the VMs CLI in a terminal. Desktop VMs are more responsive in VMware than Qemu, purely due to technical reasons that are beyond the scope of this document.
What about VMWare Fusion?
On MacOSX, VMware Fusion is used instead of VMware Workstation. The user interface of VMware Fusion is different than VMware Workstations, but it works in the same way with GNS3, so the same principles apply.
Add a virtual machine to VMWare Workstation (Local Server)
If you already have a virtual machine imported into VMware Workstation, go to the next section of this document.
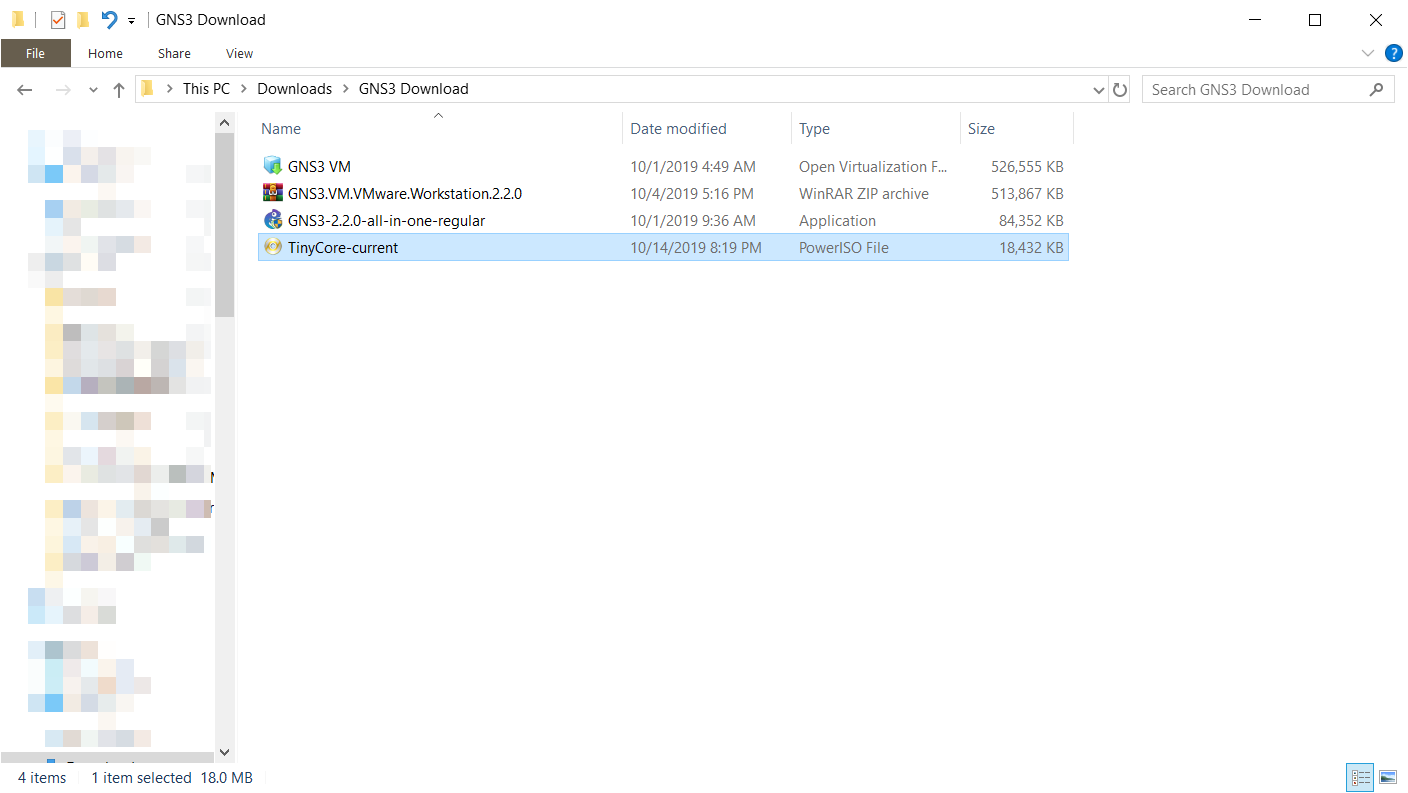
Download or copy a virtual machine ISO to your local computer. In this example, TinyCore Linux is used. This is a recommended lightweight Linux distribution:
Download link: http://tinycorelinux.net/downloads.html
ISO on local PC:
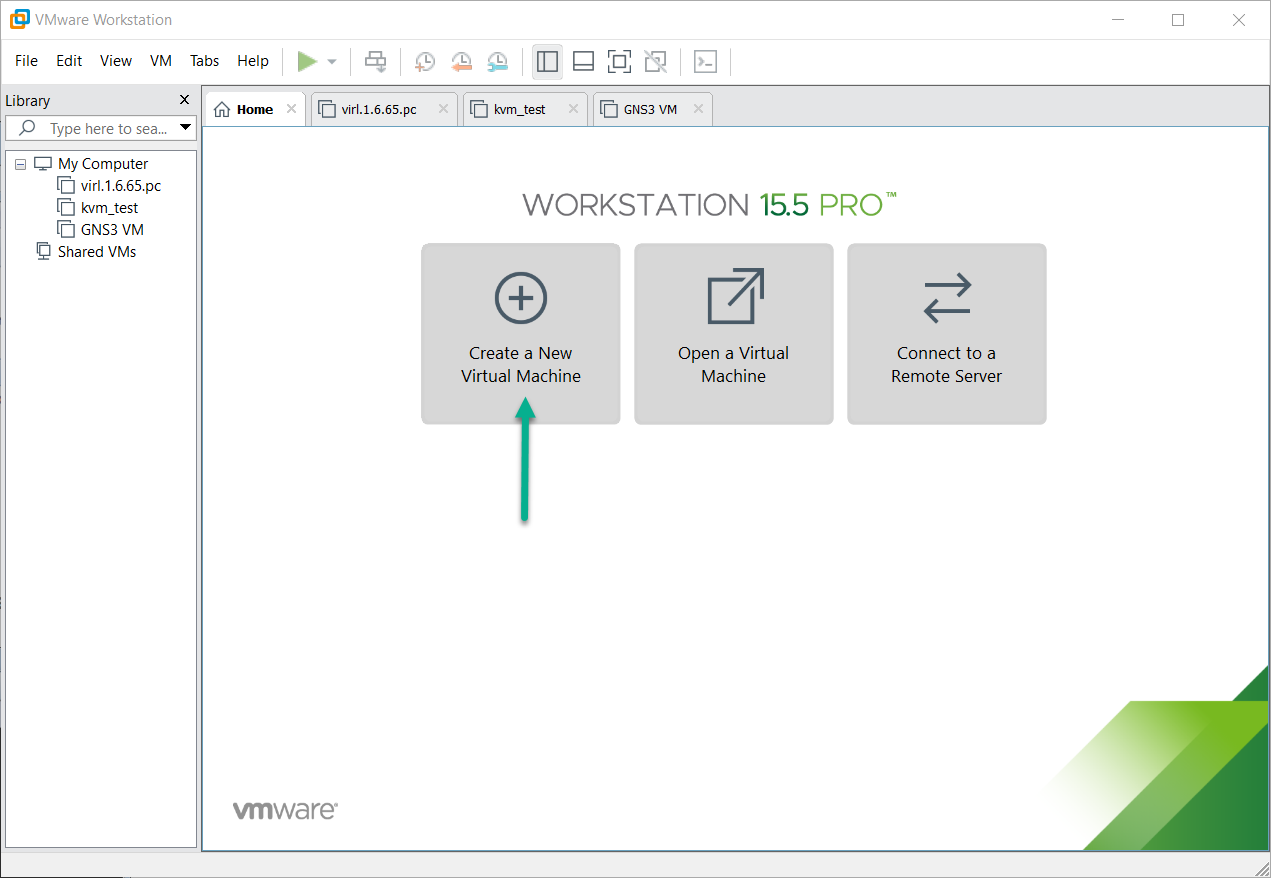
In VMware Workstation, click “Create a New Virtual Machine”:
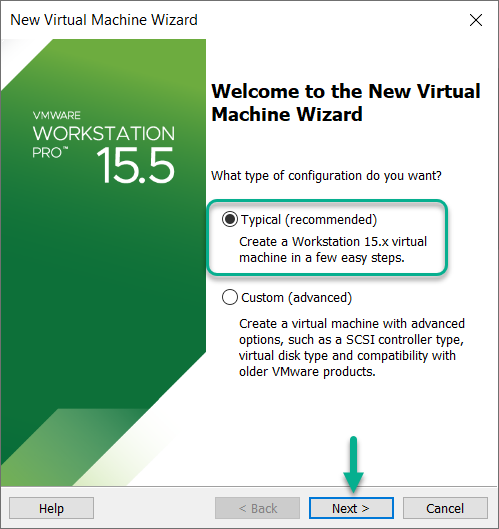
Follow the VMware Wizard to import create the new virtual machine. In the first step, select Typical and then click Next >:
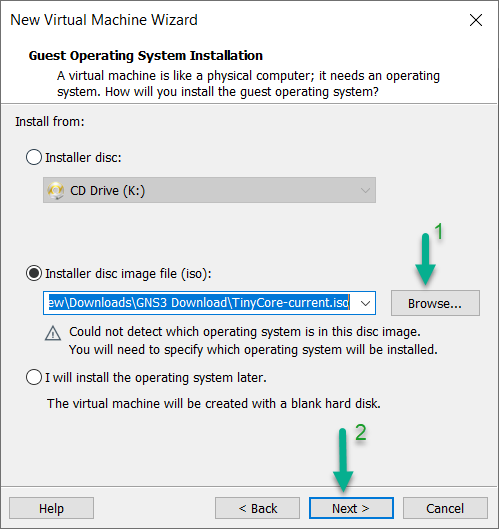
Point to the ISO file downloaded and click Next >:
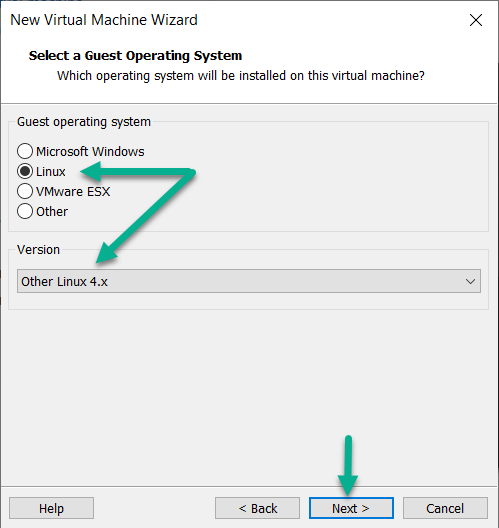
Select Linux as the Guest operating system and Other Linux 4.x as the Version and then click Next >:
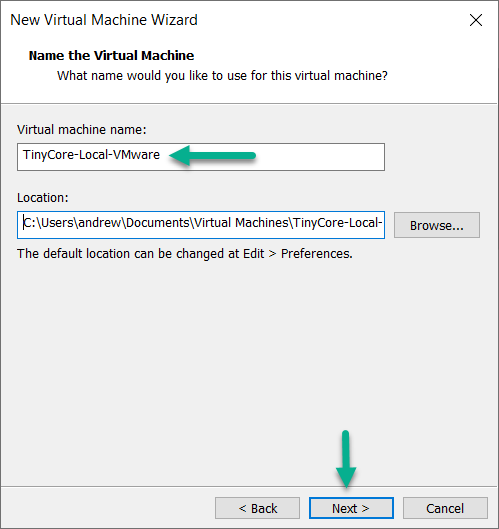
Name the VM and change the default Location if you want to. In this example the VM is called TinyCore-Local-VMware and the default Location is used. Then click Next >:
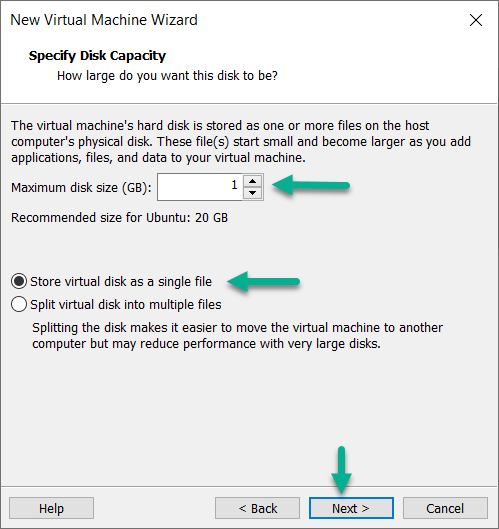
Specify the amount of disk space required by your virtual machine. In this example only 1 GB is allocated. You can also select “Store virtual disk as a single file”, as this VM will be so small. Then click Next >:
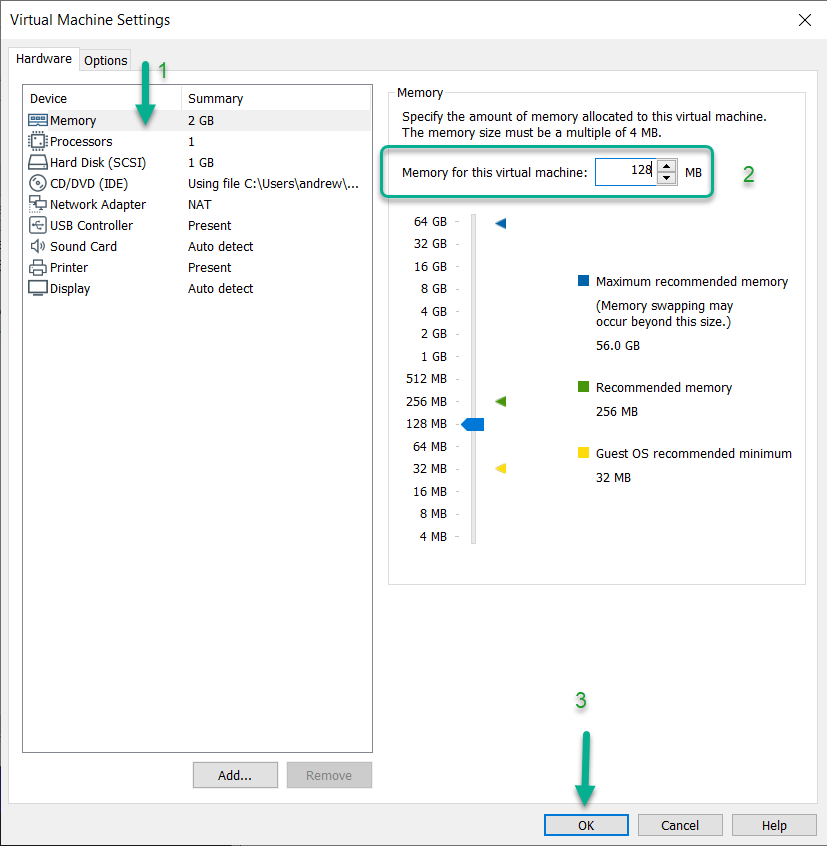
Click Customize Hardware:
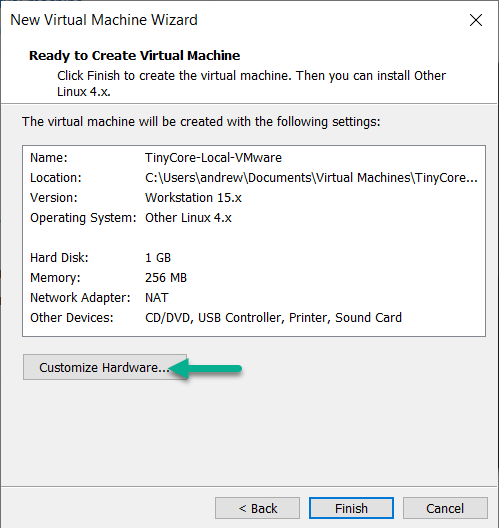
Customize the hardware of the VM as required. In this example only 128 MB of RAM is required for the VM. To do so, click “Memory” in the Virtual Machine settings, type “128” in the dialog box for the amount of memory it will use. Once the required changes have been completed, click Close:
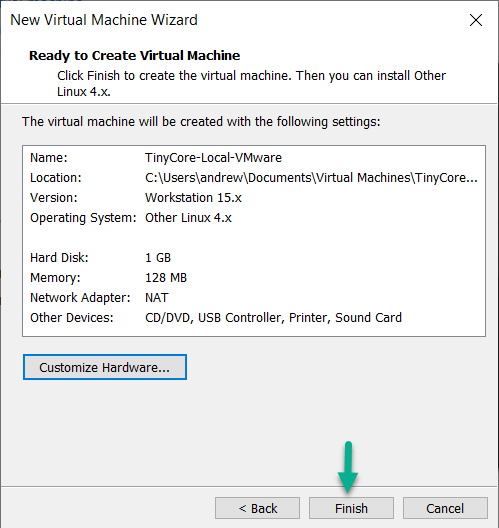
To complete the VM import, click Finish:
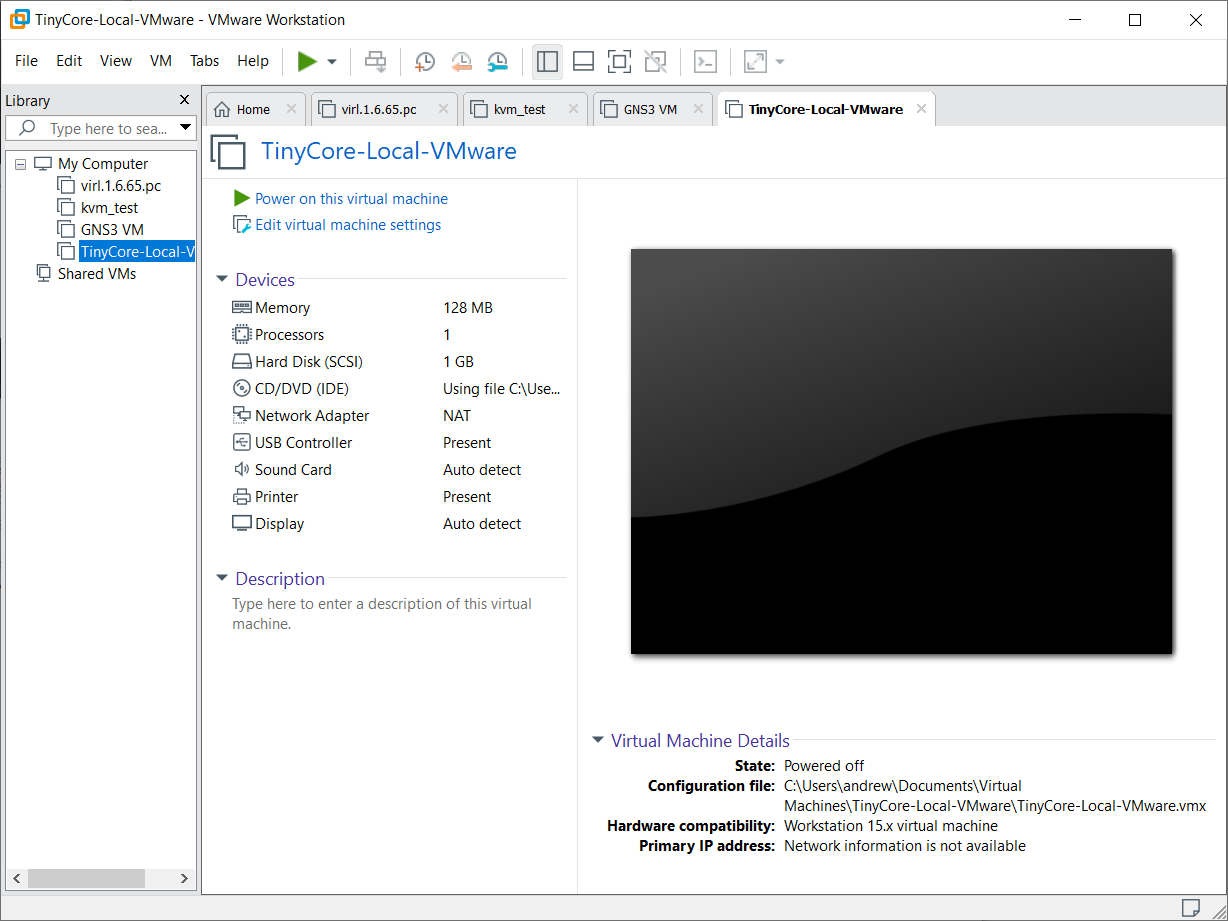
The VM is now available in VMware Workstation:
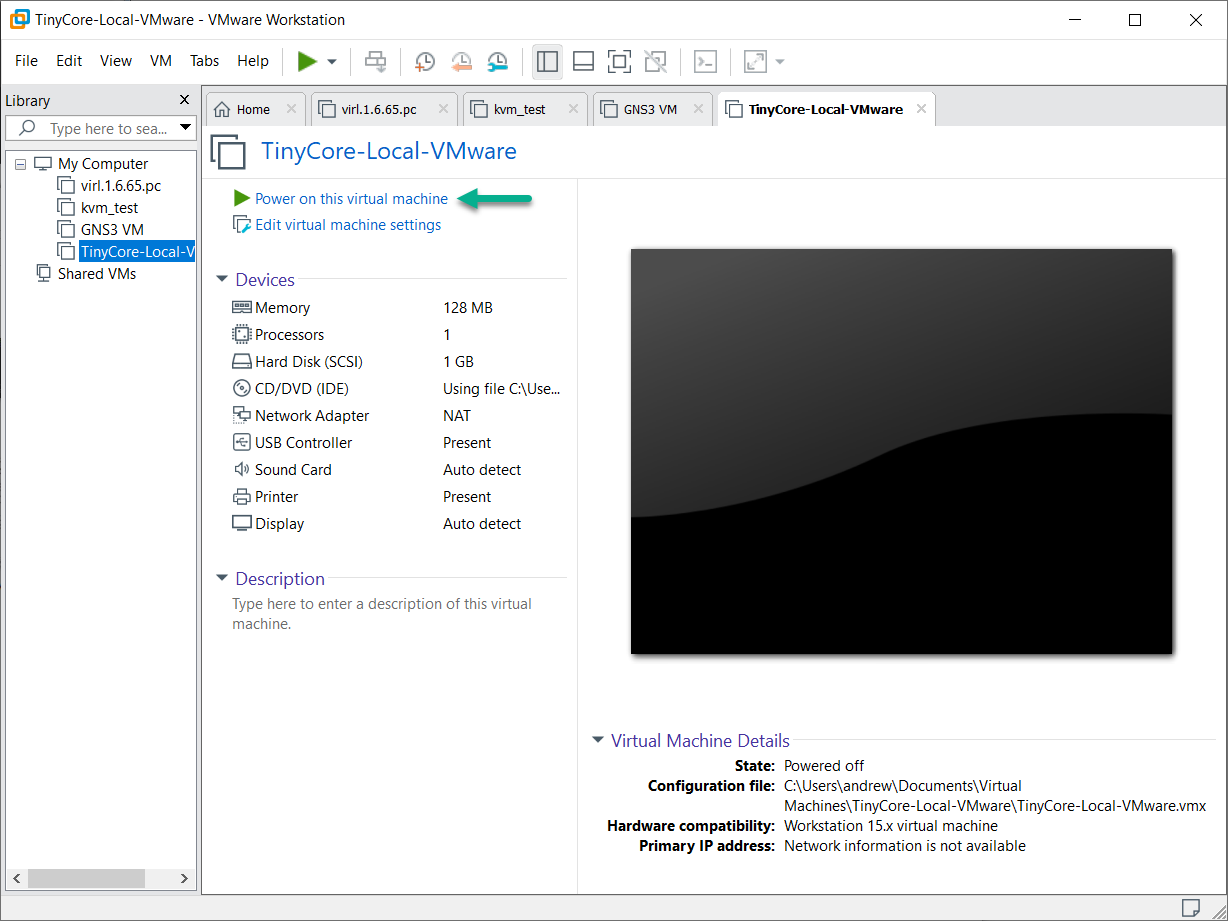
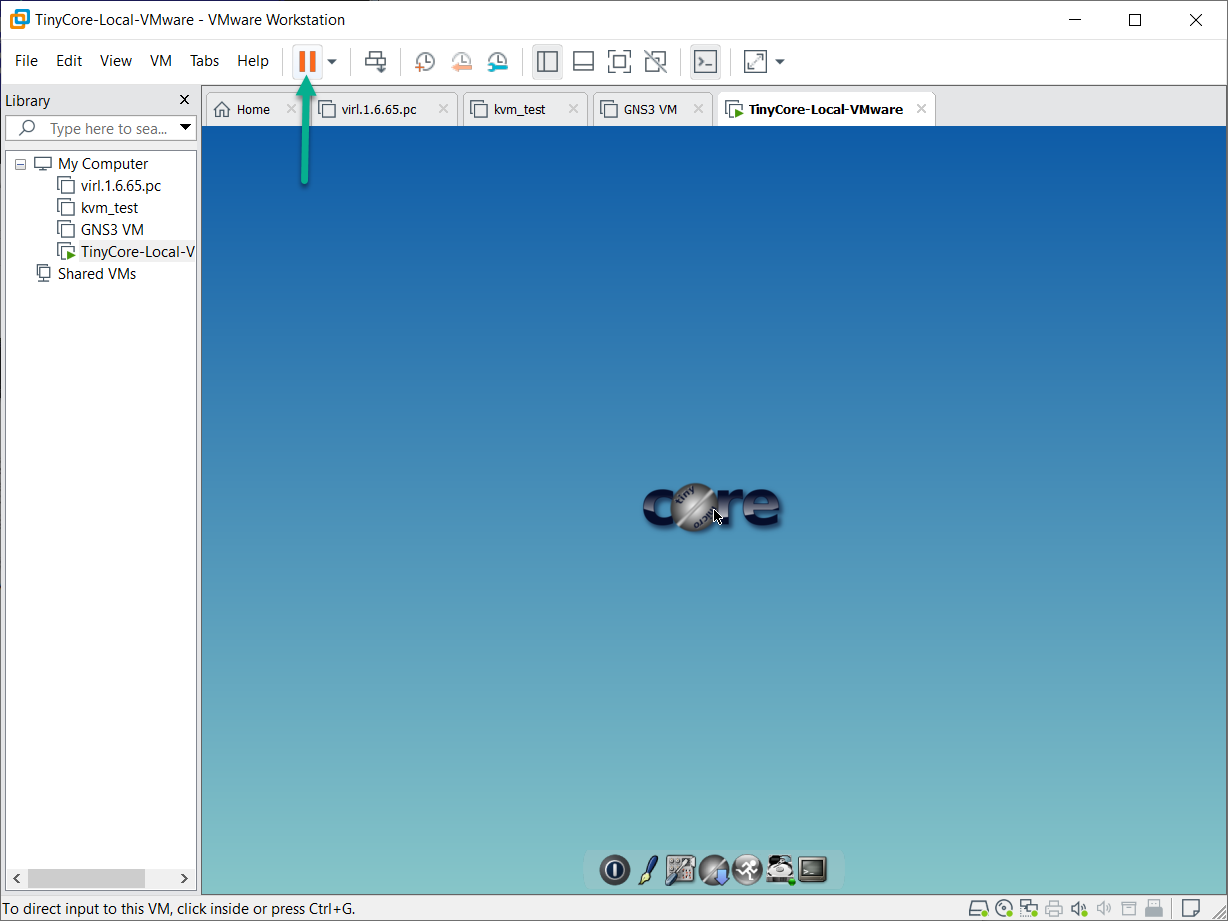
Power on the virtual machine in VMware Workstation:
Install the operating system as required. TinyCore Linux does not require this and is booted to RAM by selecting Boot TinyCore:
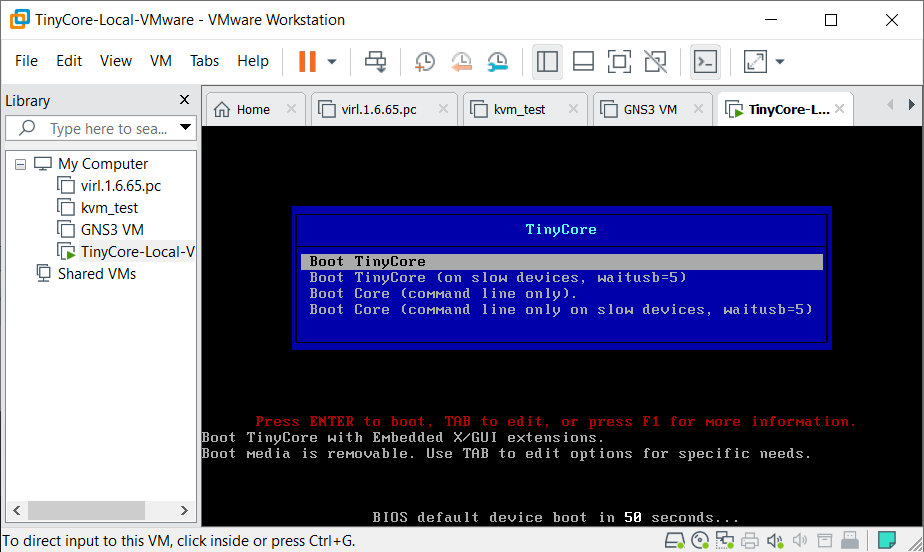
Complete any operating system installation setup as required. In this example, TinyCore simply boots up and no configuration is required:

Once install is completed, shut down the virtual machine by either clicking on the Suspend button in VMware Workstation and select Power Off (shown below), or right-clicking on the tab for the virtual machine (containing its name), select Power, and then Shut Down Guest (not shown):
You are now ready to integrate the new VM with GNS3.
Add a virtual machine to GNS3 (Local Server)
Once you have installed and configured your virtual machine in VMware Workstation, you are ready to integrate the VM with GNS3.
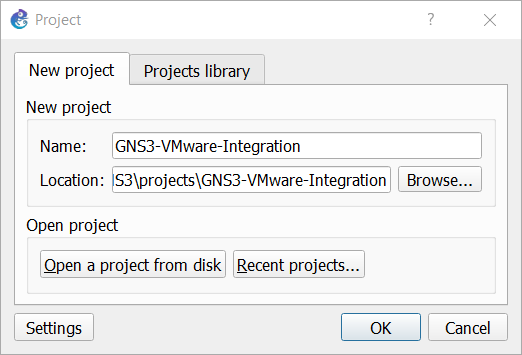
Start GNS3 and create a New project:
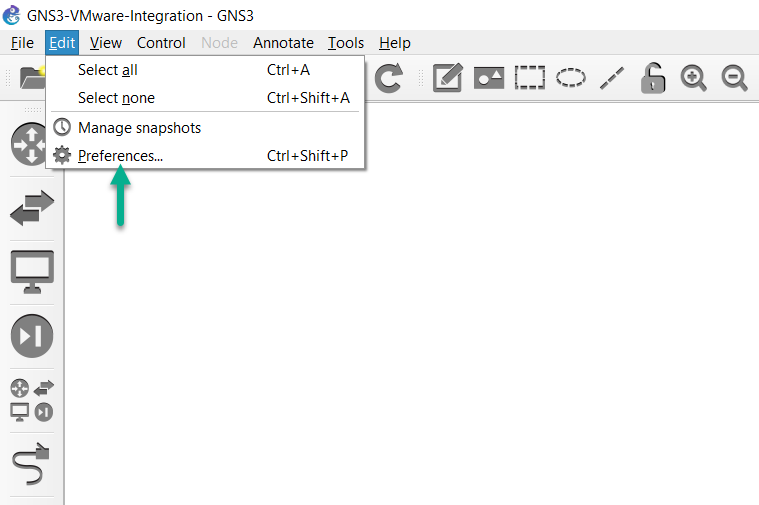
Click Edit and then Preferences:
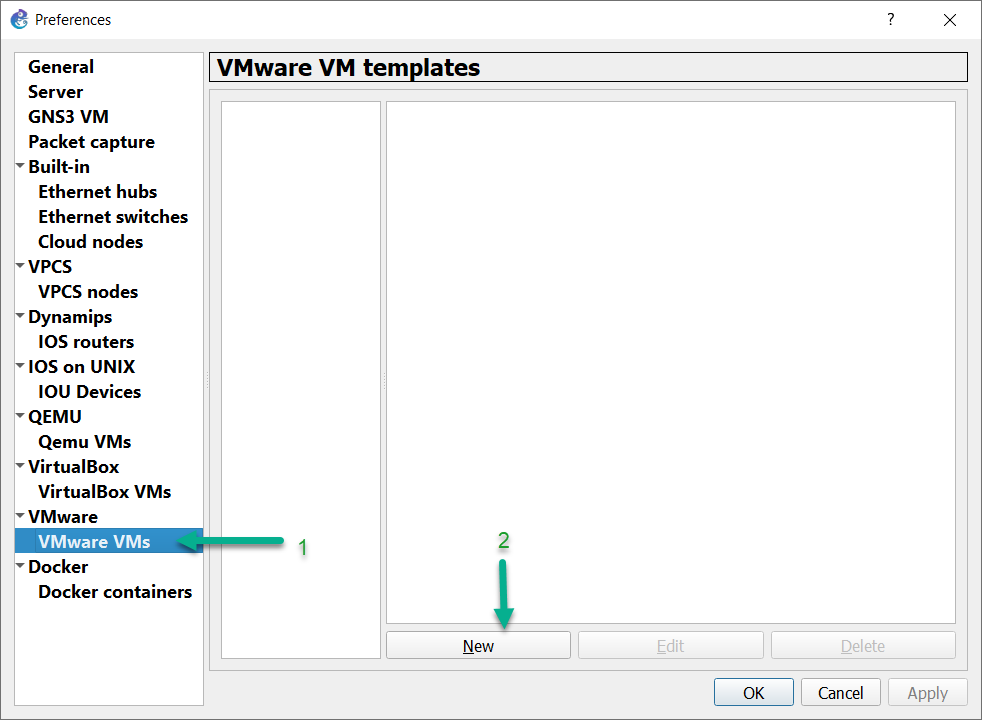
Click VMware VMs and New, to add a new VMware virtual machine:
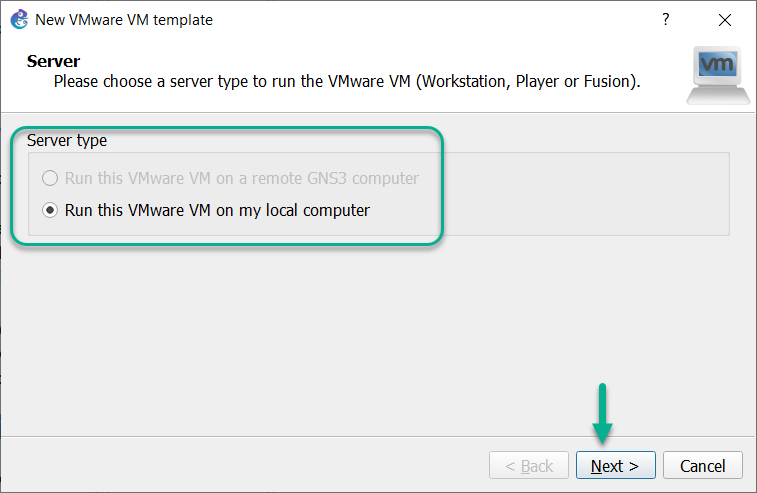
You will be prompted which server type to use, to run this virtual machine. As this article uses the local server, the remote server option is greyed out. Click Next>:
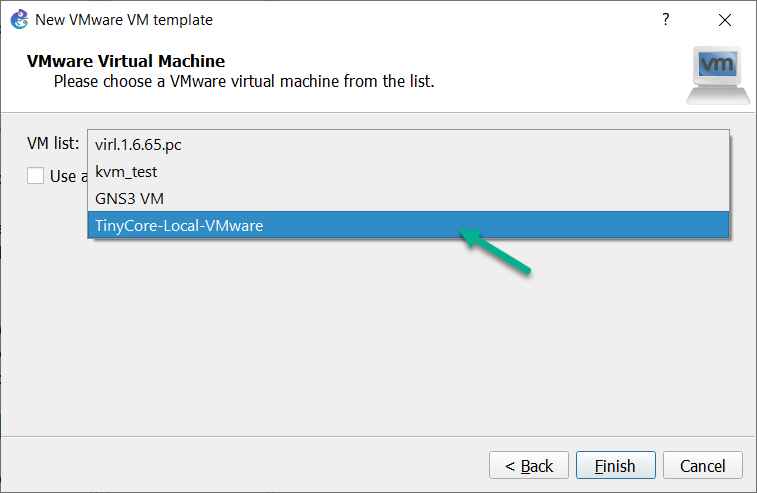
On the next screen, click on the dropdown:

The dropdown lists all the available VMware virtual machines available on this computer. Left-click on your new TinyCore-Local-VMware virtual machine to select it:
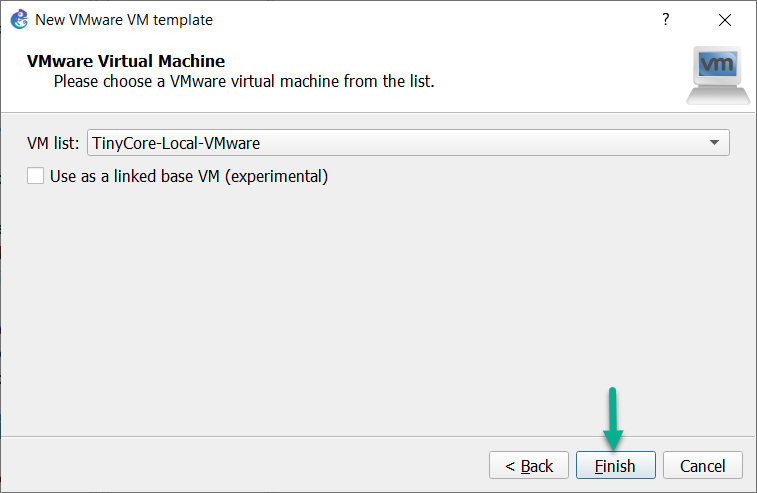
Click Finish> to complete the import process:
The new virtual machine is now available in GNS3. Ensure that it is still highlighted, and click Edit to change the VM settings:
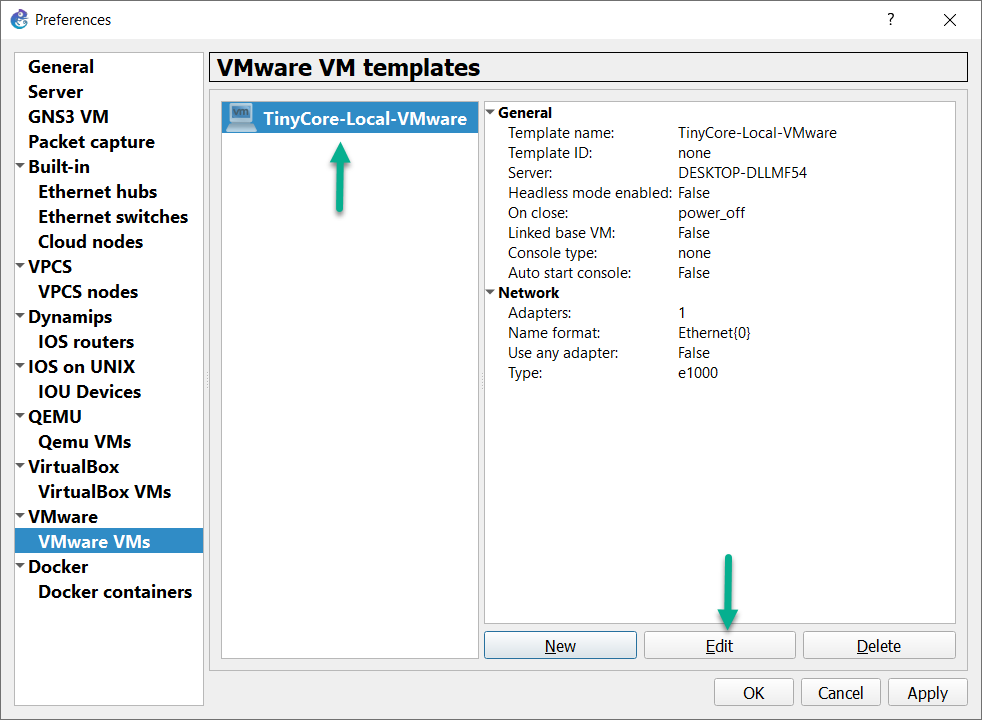
Click the Network Tab:

Ensure that “Allow GNS3 to override non custom VMware adapter” is selected, and click OK to finish editing the TinyCore-Local-VMware virtual machine’s properties.
GNS3 will randomly select an available Host-only VMnet to bridge the VMware virtual machine into the GNS3 topology. VMnet 0 (bridged), VMnet 1 (host-only), and VMnet 8 (NAT) are available in VMware by default, but will not be used by GNS3 for this purpose!
It is important that any new Host-Only VMnet created for GNS3 to use have the default DHCP for it disabled!
Below a screenshot of the Virtual Network Editor (VNE) in VMware Workstation Pro, showing additional Host-only VMnets (VMnets 2-7, and 9 - 19), for illustration purposes. VNE is unavailable to users of VMware Workstation Player.
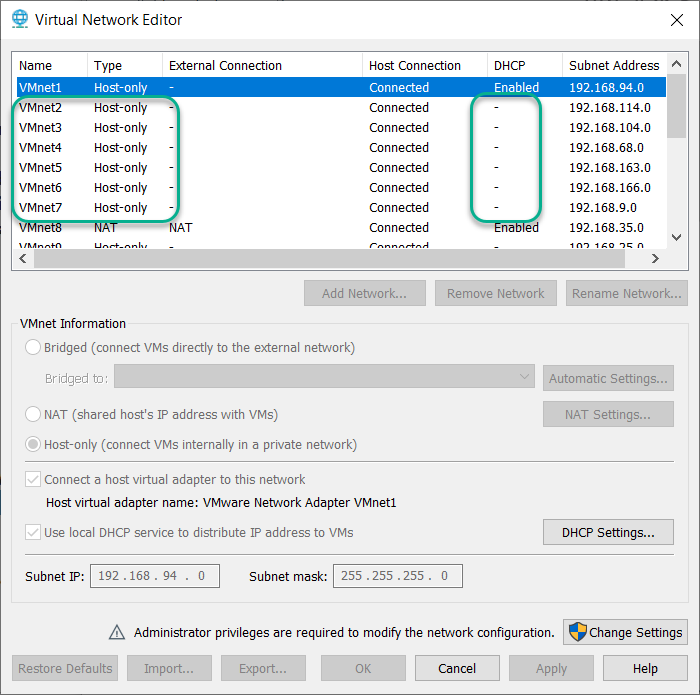
(notice that VMnets 2 - 7 are Host-only, and have their own local DHCP servers disabled. That is important!!)
VMware Workstation Players (and VMware Workstation Pro users) can use a script included with GNS3 (named gns3vmnet) to automatically create and configure the additional VMnets necessary.
In Windows, this executable is located in the default GNS3 installation directory:
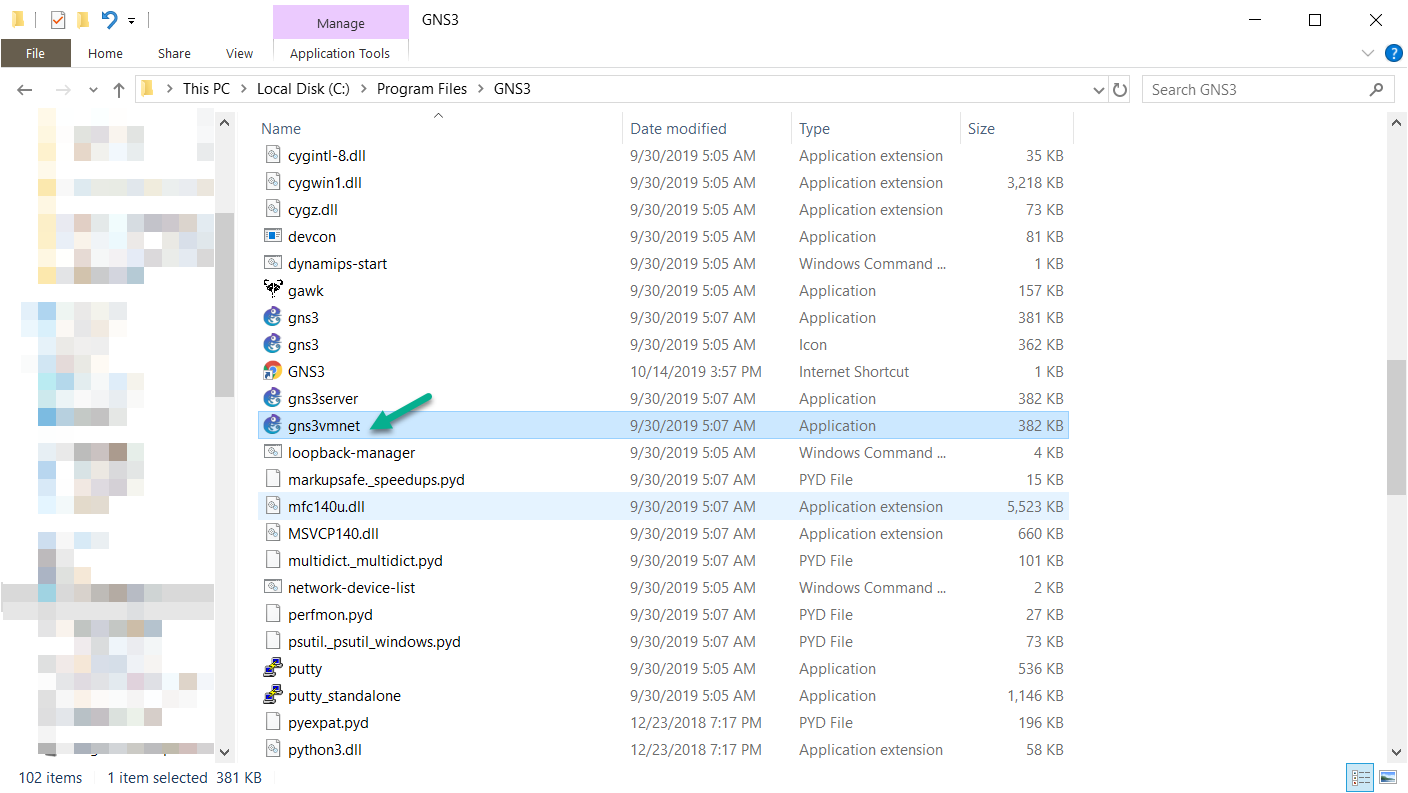
(You may need to create an exemption/exclusion in your anti-virus software to allow this executable to run. This process varies, so consult the documentation of the anti-virus suite you use for instructions.)
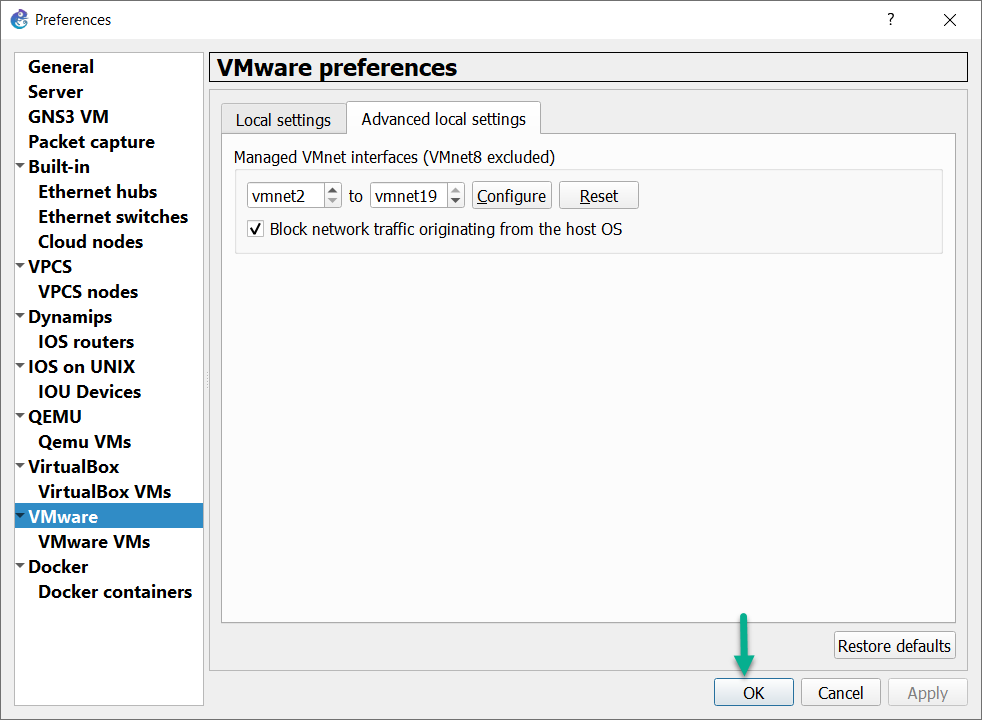
To have GNS3 automatically create the necessary Host-only VMnets for you (using the aforementioned gns3vmnet file), click on VMware -> Advanced local settings, and then click on the Configure button:
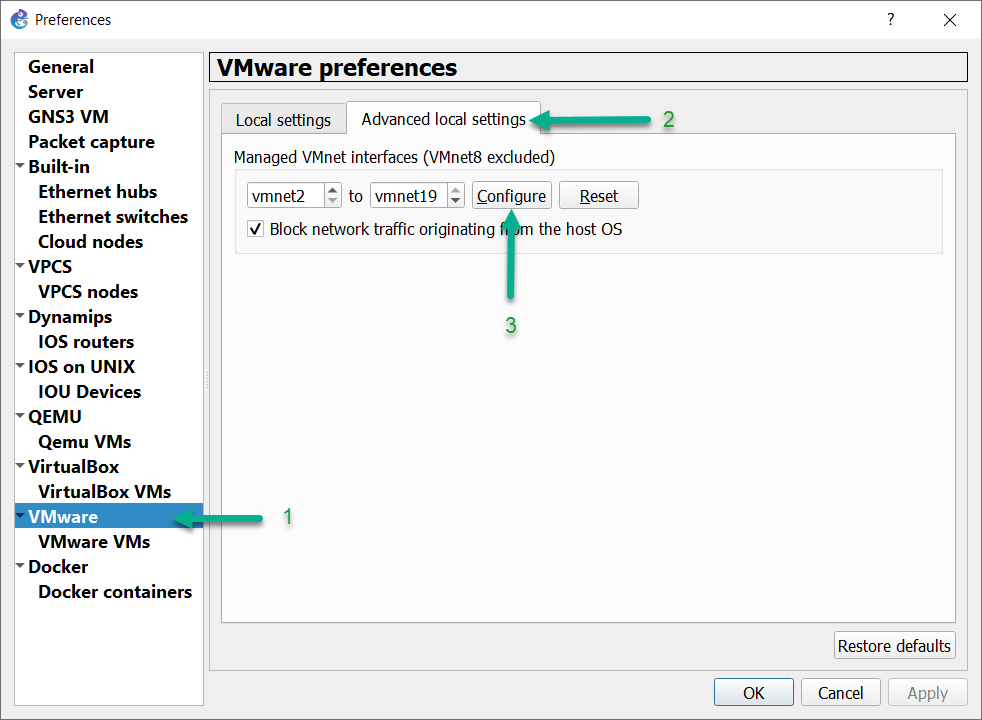
(If necessary, you can have GNS3 remove the host-only VMnets it created by clicking the Reset button, instead).
Once completed, click Click OK to complete the integration.
Create a GNS3 Topology
Once you have integrated the new virtual machine with GNS3, you can now create topologies that contain the new VM.
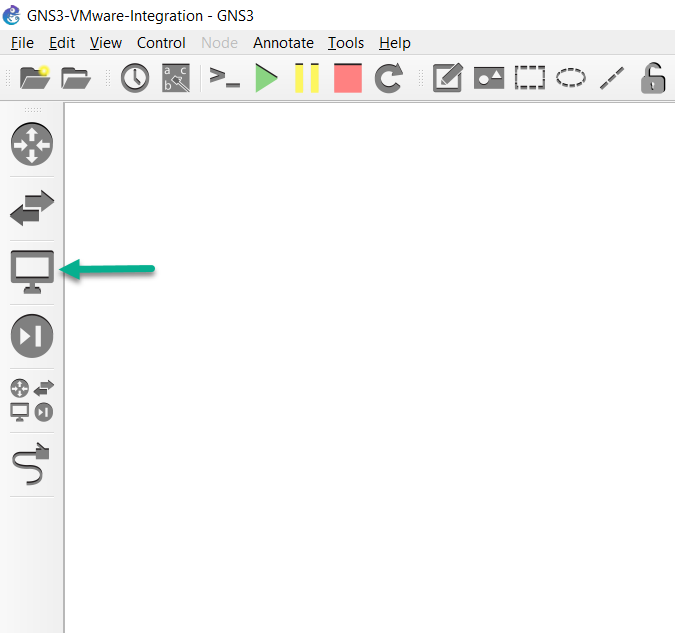
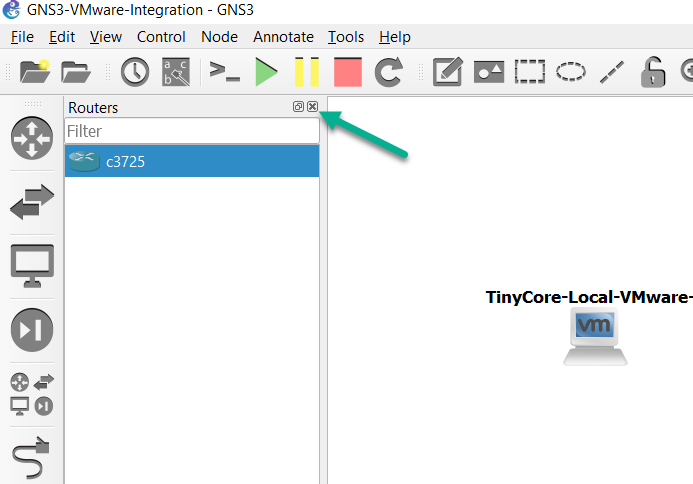
To create a new GNS3 topology, select a group of devices in the Devices Toolbar by clicking the End Devices button
The new virtual machine is now available to be added to a GNS3 topology:
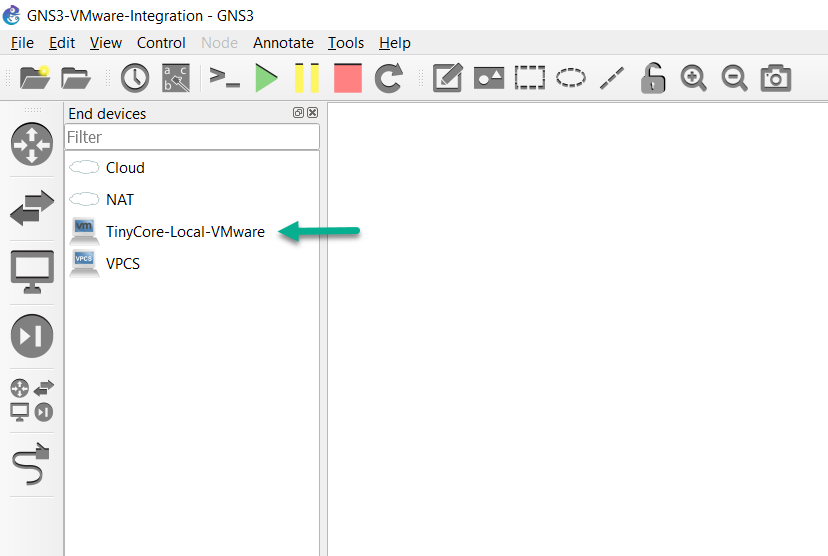
Drag and drop the selected node (device) to the GNS3 Workspace. An instance of the node becomes available in the Workspace. In this example, the TinyCore PC is now available:

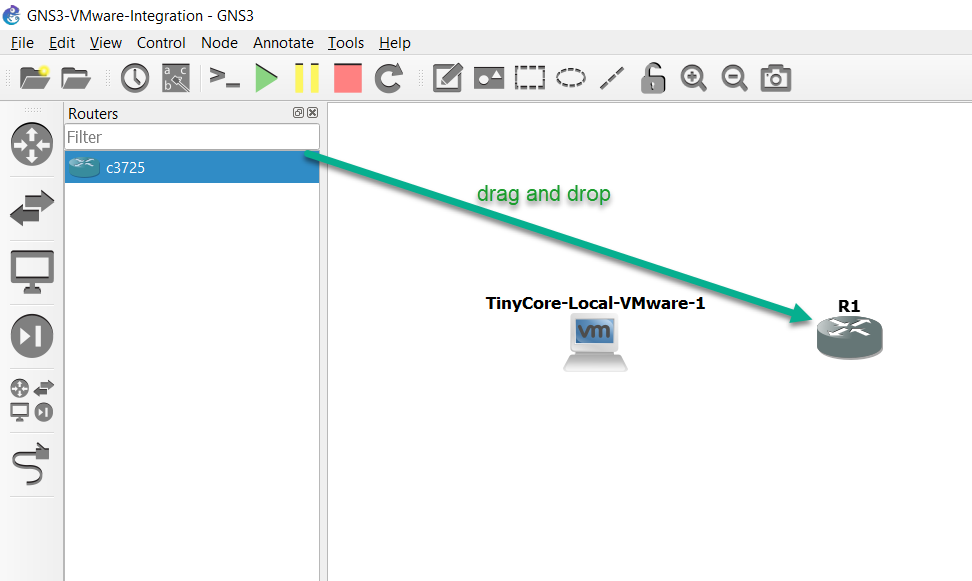
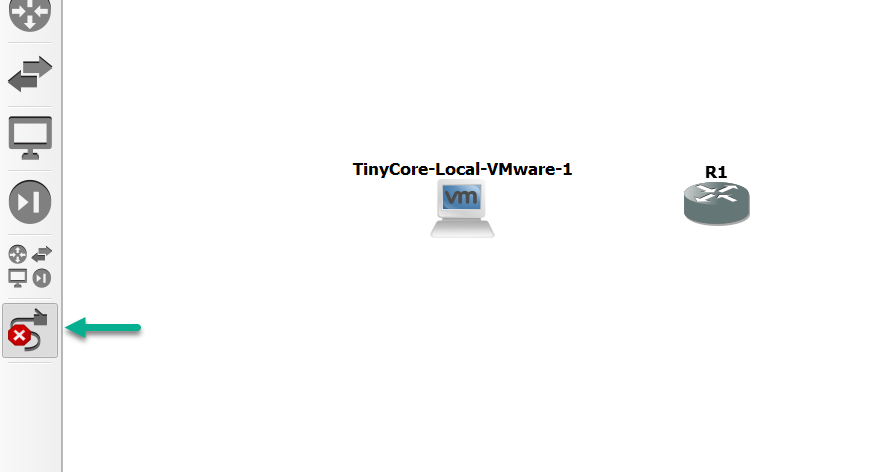
Drag and drop another node into the GNS3 Workspace. For this article, a router will be added to the GNS3 workspace. The devices available will depend on your GNS3 configuration:
Click the Toolbar Device button again to collapse the group:
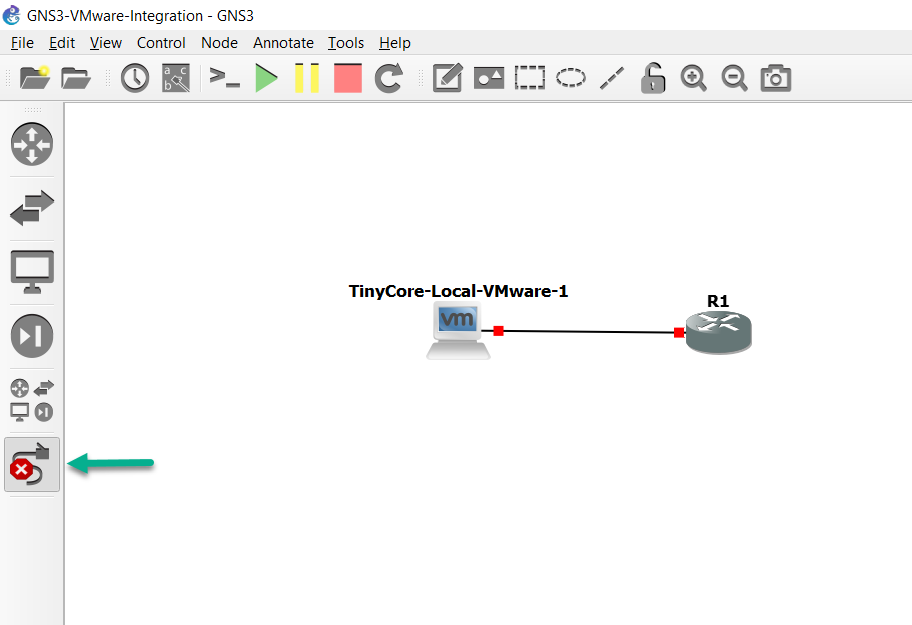
Click the Add a Link button to start adding links to your topology. The mouse cursor will change to indicate that links can be added:
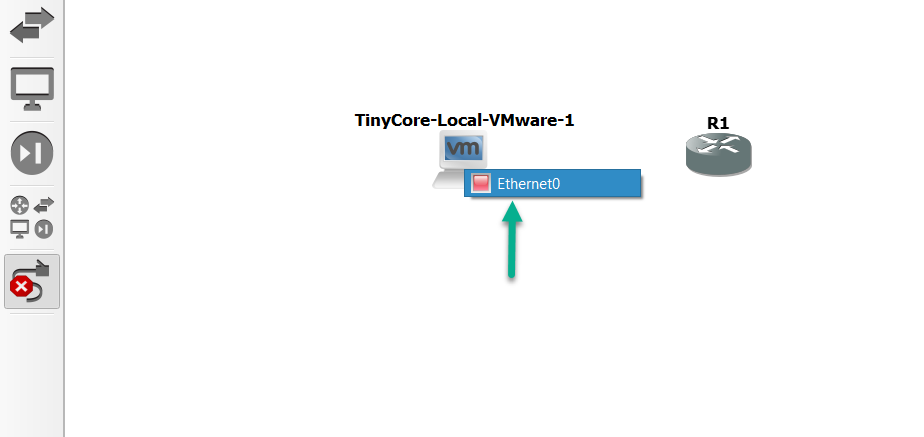
Click on the TinyCore-Local-VMware~1 virtual machine in your topology, to display its available interfaces. In this example Ethernet0 is available (the available interfaces will be device dependant):
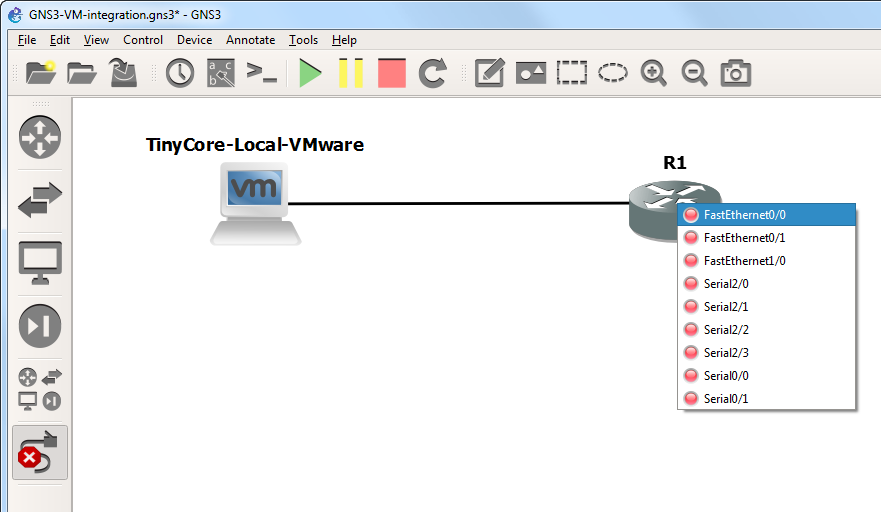
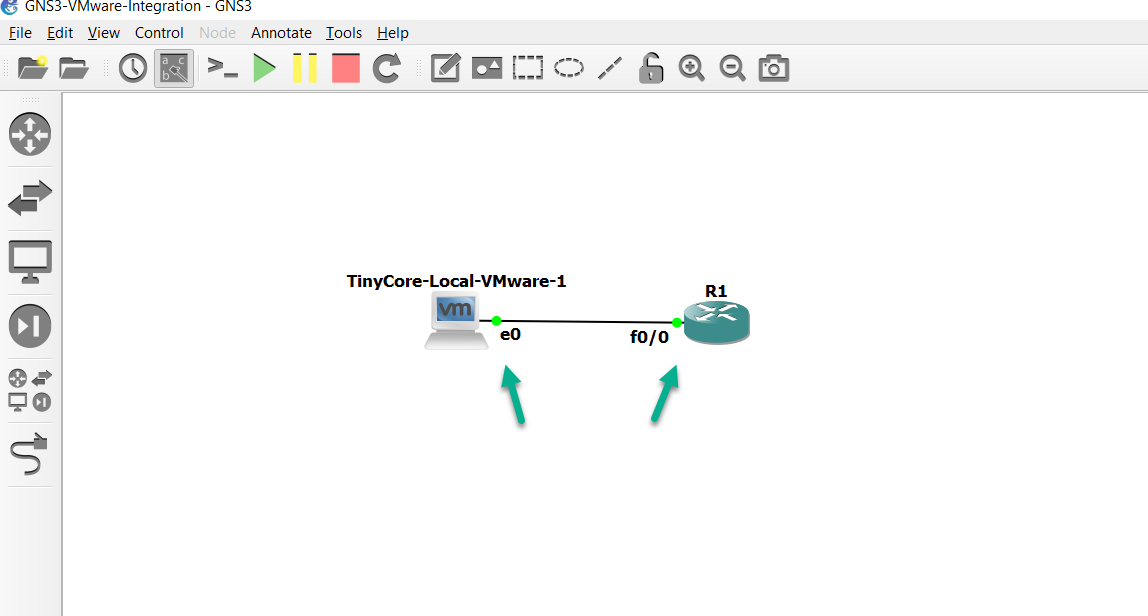
Click the interface and then select another device in the topology to connect the interface to. In this example Ethernet 0 on TinyCore-Local-VMware was selected and the link was joined to the FastEthernet0/0 interface of R1:
Click the Add a Link button to stop adding links. The mouse cursor will change back to normal to indicate that you have stopped adding links:
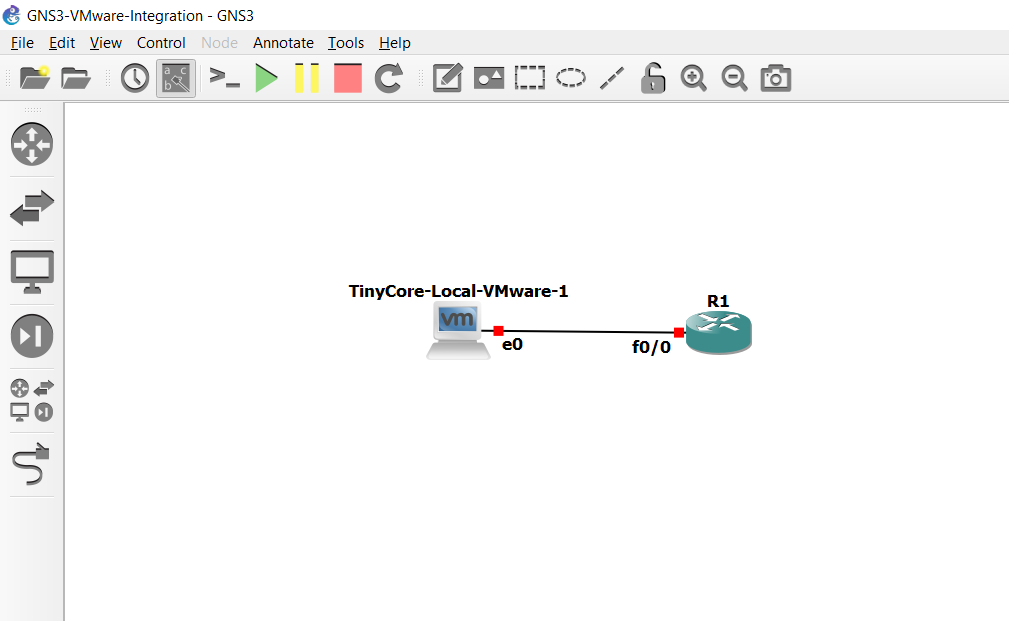
Click the Show/Hide interface labels button on the GNS3 Toolbar to display interface labels in your topology:
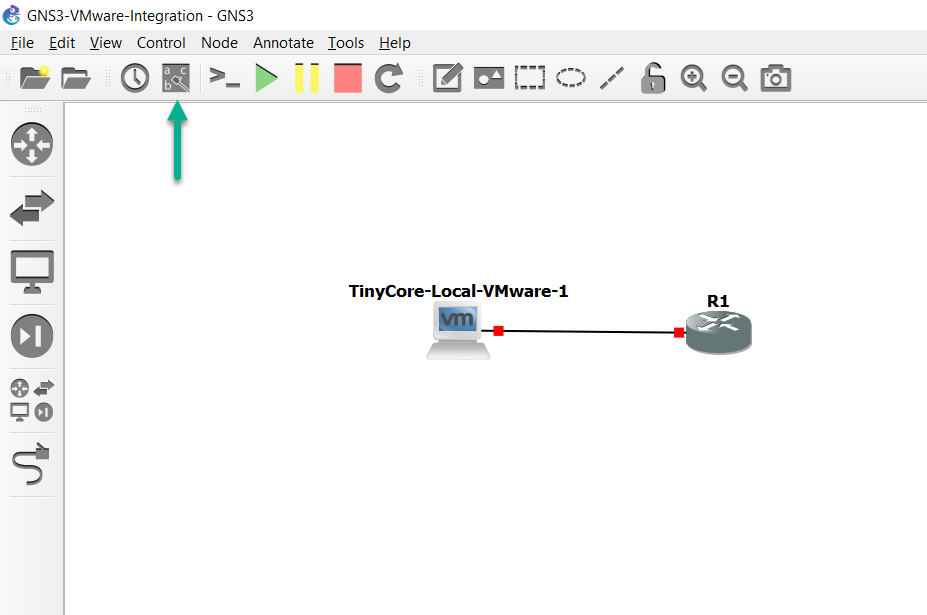
This will display the connected interfaces of both devices:
You are now ready to power on your network devices. Click the Start/Resume button on the GNS3 Toolbar to start up your network devices:
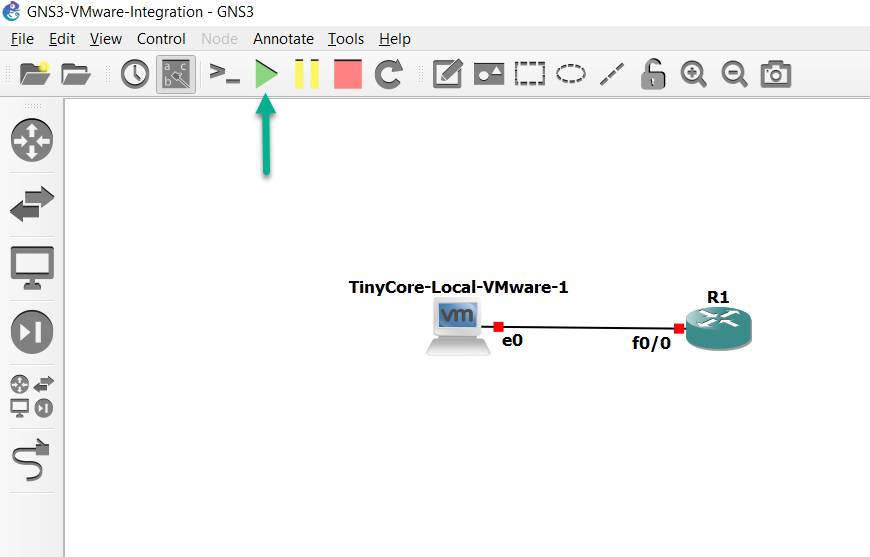
GNS3 indicates that the devices have been powered on by turning the interface connectors from red to green:
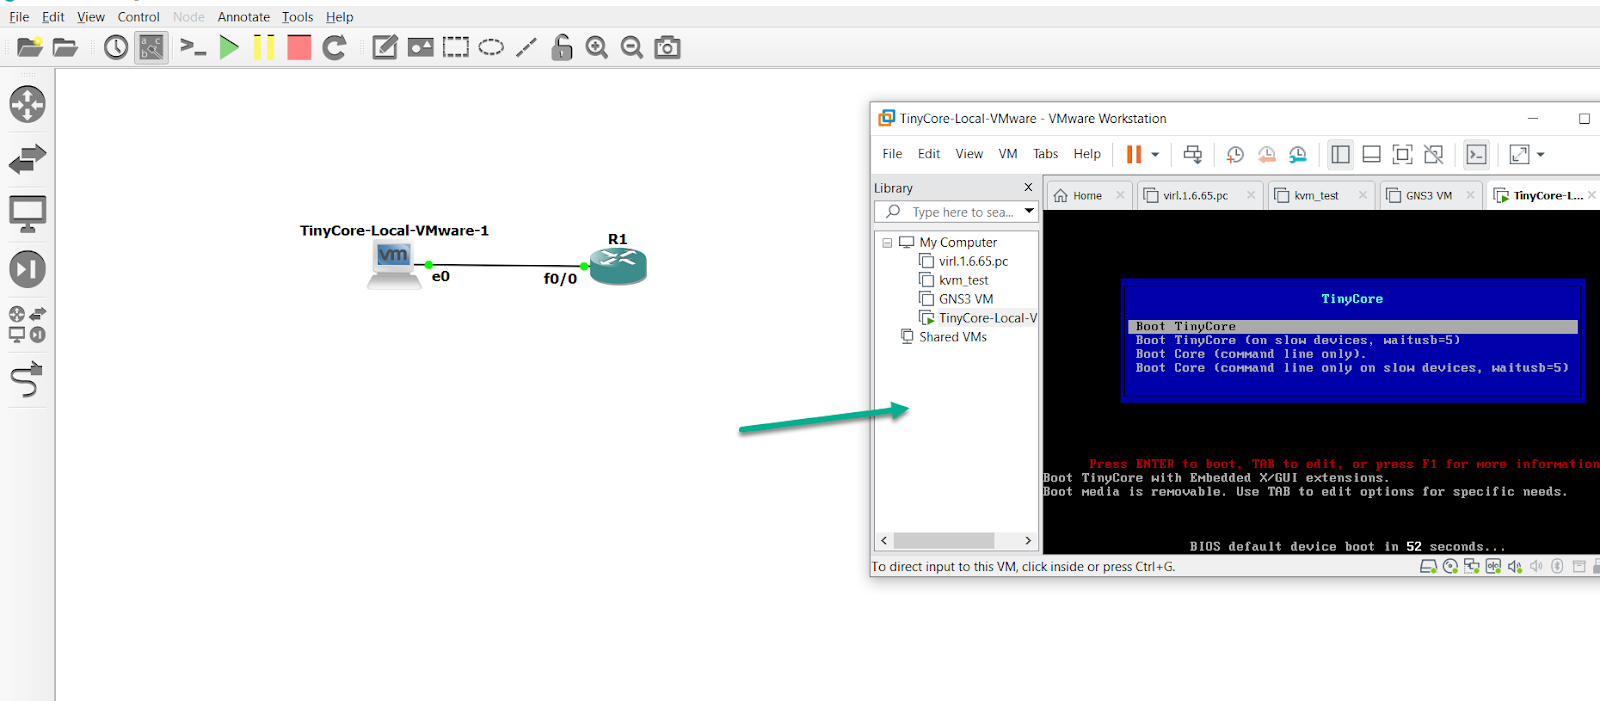
GNS3 will automatically start up the VMware virtual machine when you click the start button (shown below). The only available console options for this TinyCore-Local-VMware are None and Telnet. We will be using the GUI displayed in GNS3 to configure this device:
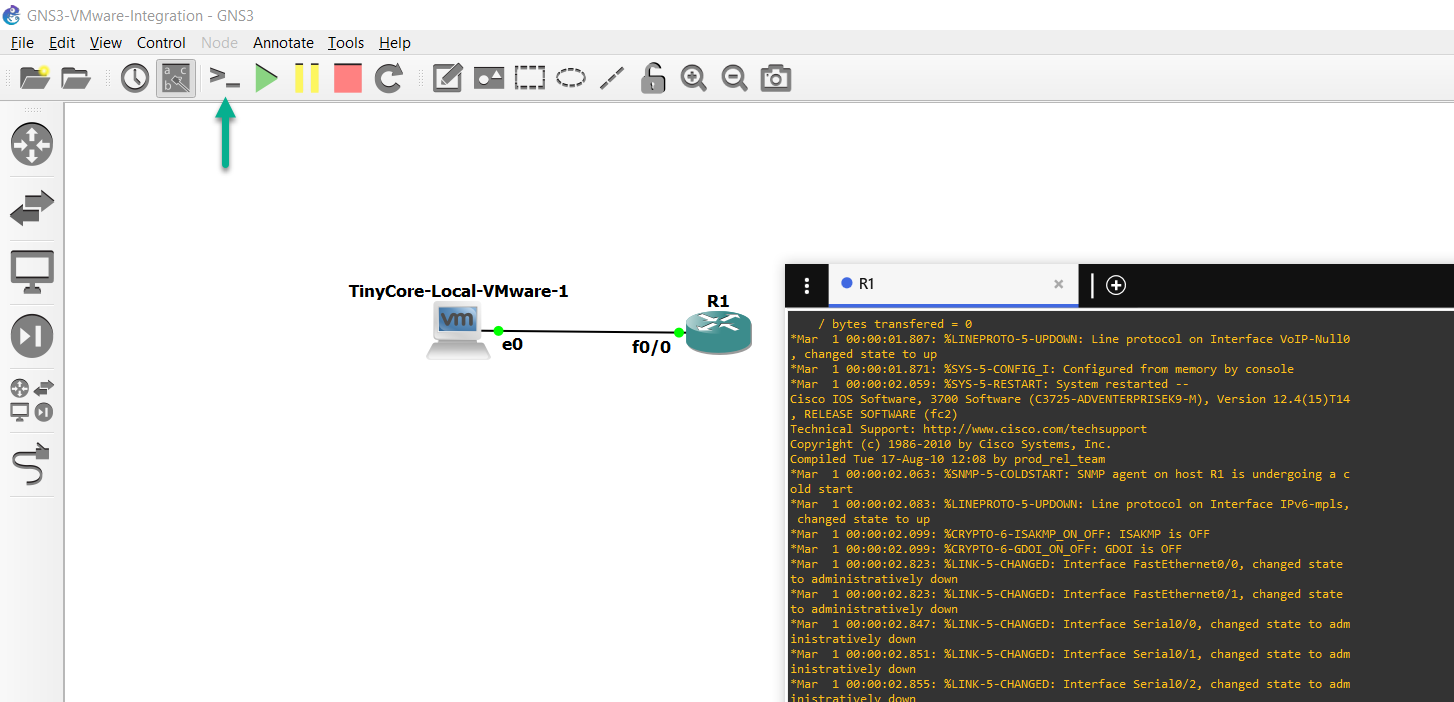
To access the serial console of the router (or any other additional nodes you may have in your topology), click the Console All button in the Toolbar to launch your select terminal emulator. The below example uses Solar-PuTTY, as it’s included in the Windows GNS3 All-in-one installer from gns3.com, and is set to be the default terminal emulator (you’re free to select a different terminal emulator. There are instructions available in this article showing how to do so).
Be advised that Solar-PuTTY is not included by default if the GNS3 AIO installer was downloaded from Github (regular PuTTY will be included instead).
Solar-PuTTY is available for free on SolarWinds website here.
If you have downloaded Solar-PuTTY from SolarWinds will be in a .zip archive. Decompress that file, copy the Solar-PuTTY executable to the GNS3 installation directory. This article (the same one linked to above) shows how to change the default terminal emulator GNS3 will use.
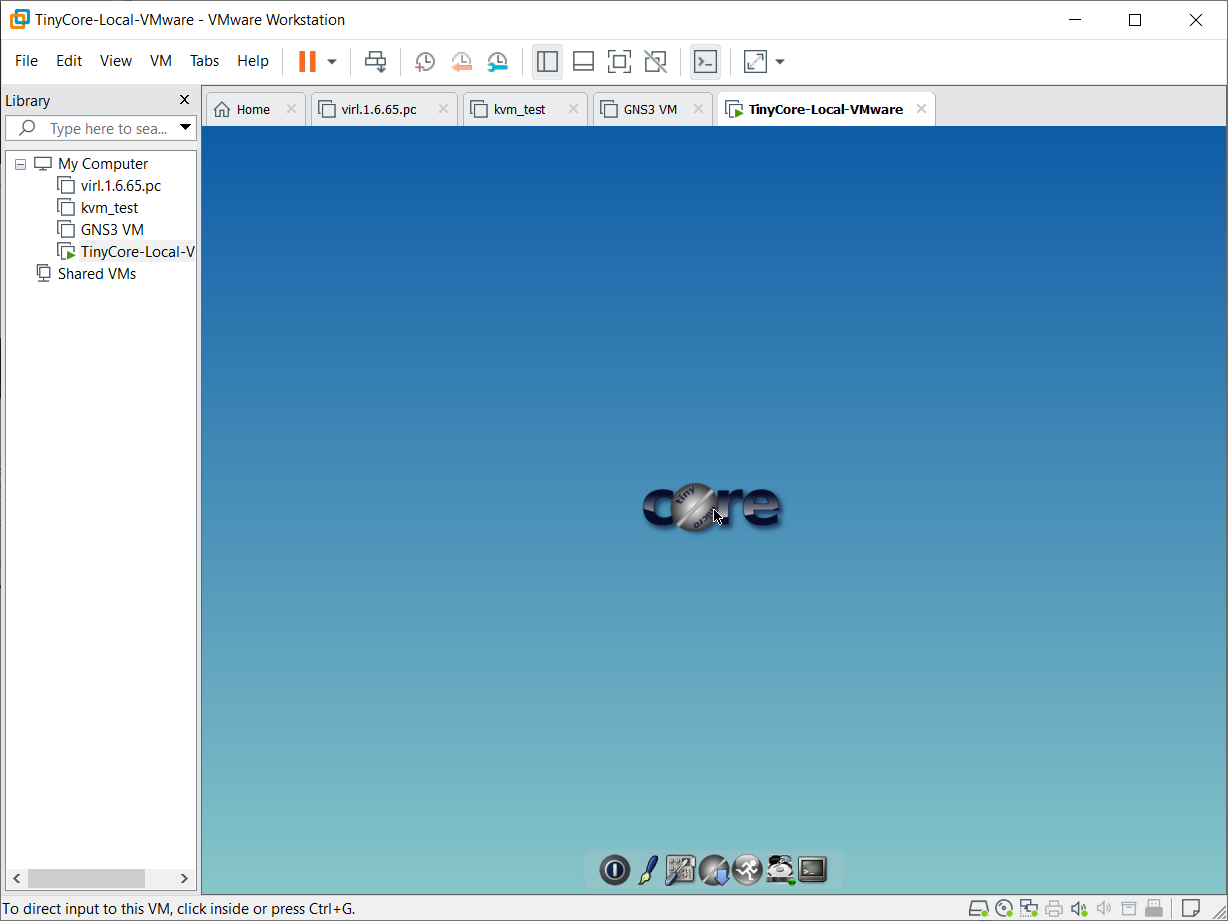
Let’s go back to the TinyCore-Local-VMware virtual machine running in the VMware Workstation GUI:
In this example, R1 is configured as follows:
R1# configure terminal
R1(config)# interface fastEthernet 0/0
R1(config-if)# ip address 10.1.1.1 255.255.255.0
R1(config-if)# no shutdown
R1(config-if)# end
R1#
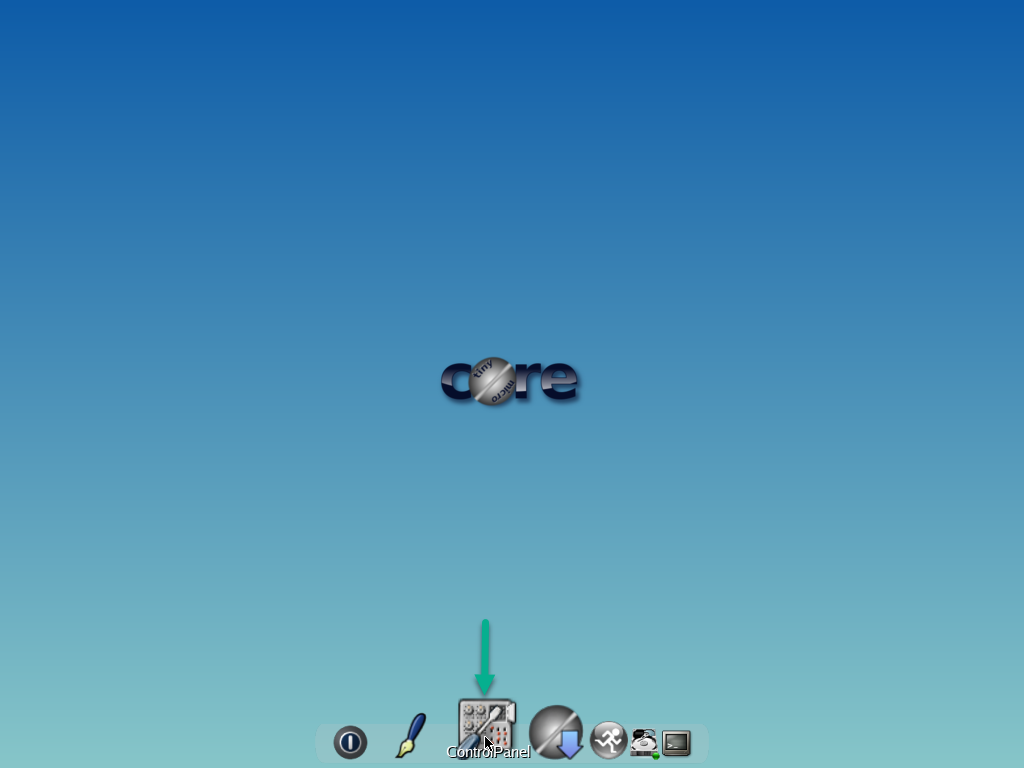
Configure the VM with an IP address in the same subnet. In TinyCore, this is done by first selecting the Control Panel:
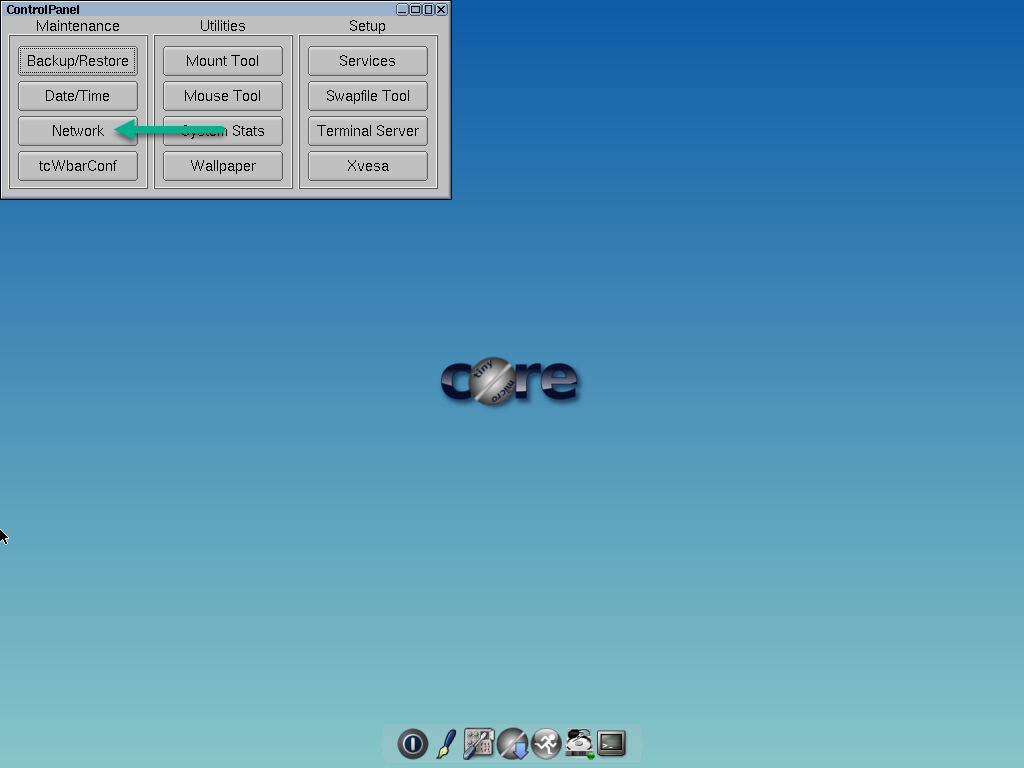
Click Network:
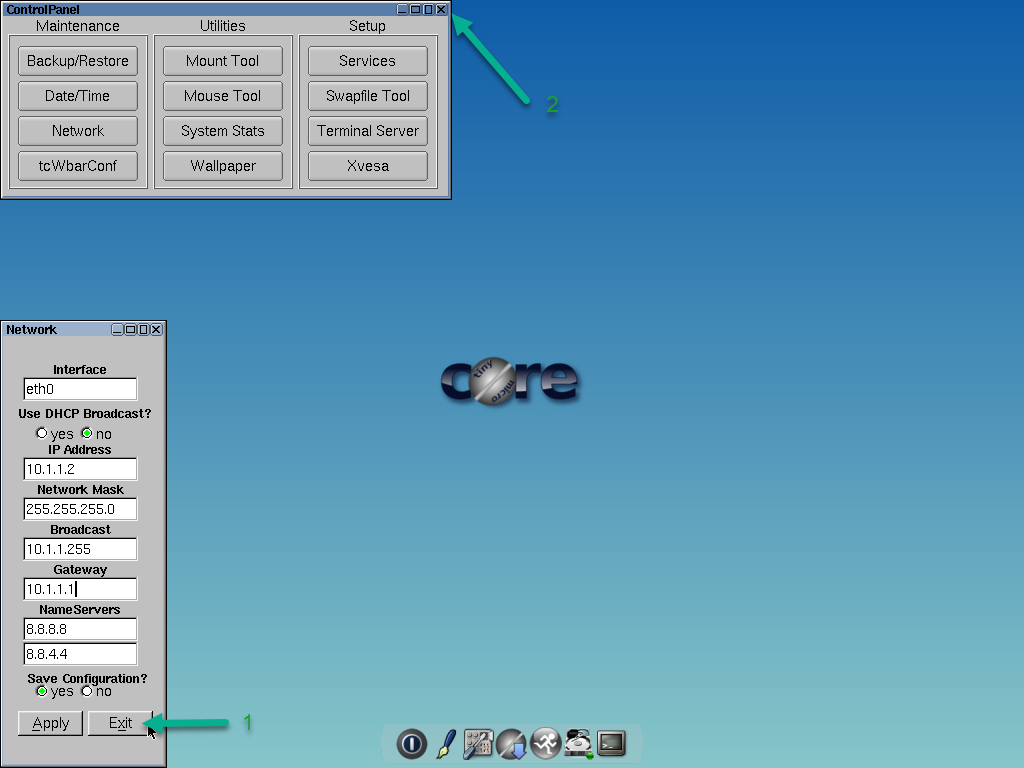
Configure the relevant IP addressing information and click Apply and then Exit:

In this example the following settings have been used:
Interface: eth0
IP address: 10.1.1.2
Mask: 255.255.255.0
Broadcast: 10.1.1.255
Gateway: 10.1.1.1
DNS: 8.8.8.8
Click Apply to save the network configuration of this VM.

Click Exit to close the Network Configuration pop-up window, and then click on the X in the upper-right corner of the TinyCore Control Panel to close it:
Click on the Terminal icon at the bottom of the TinyCore GUI to open a terminal:
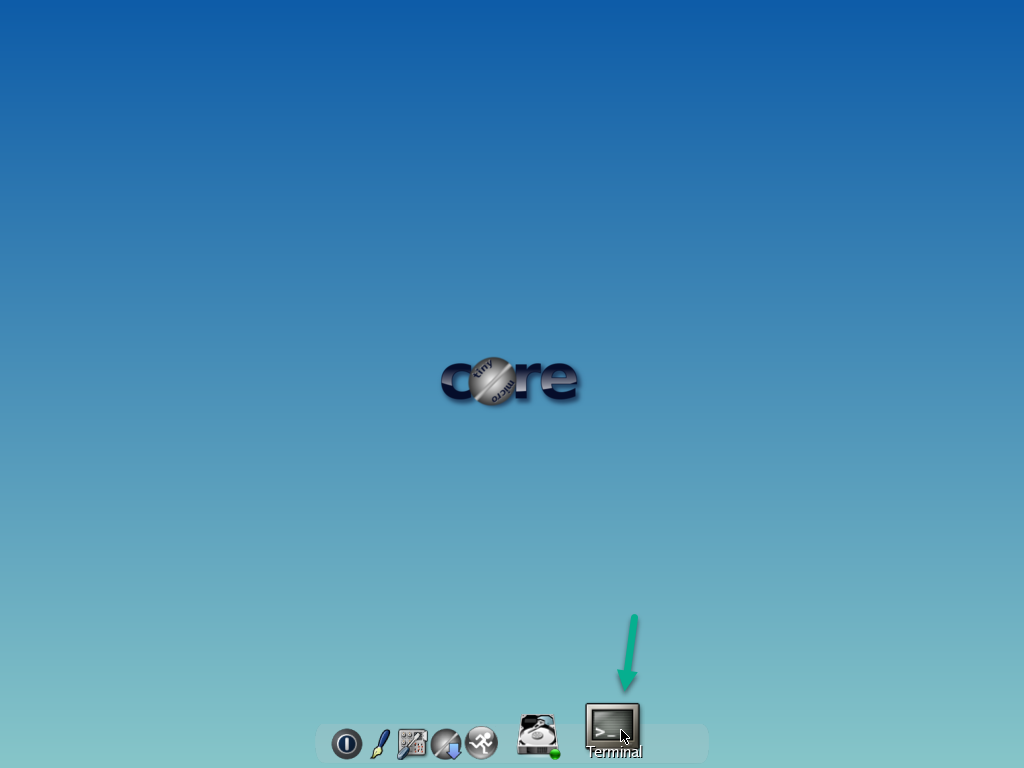
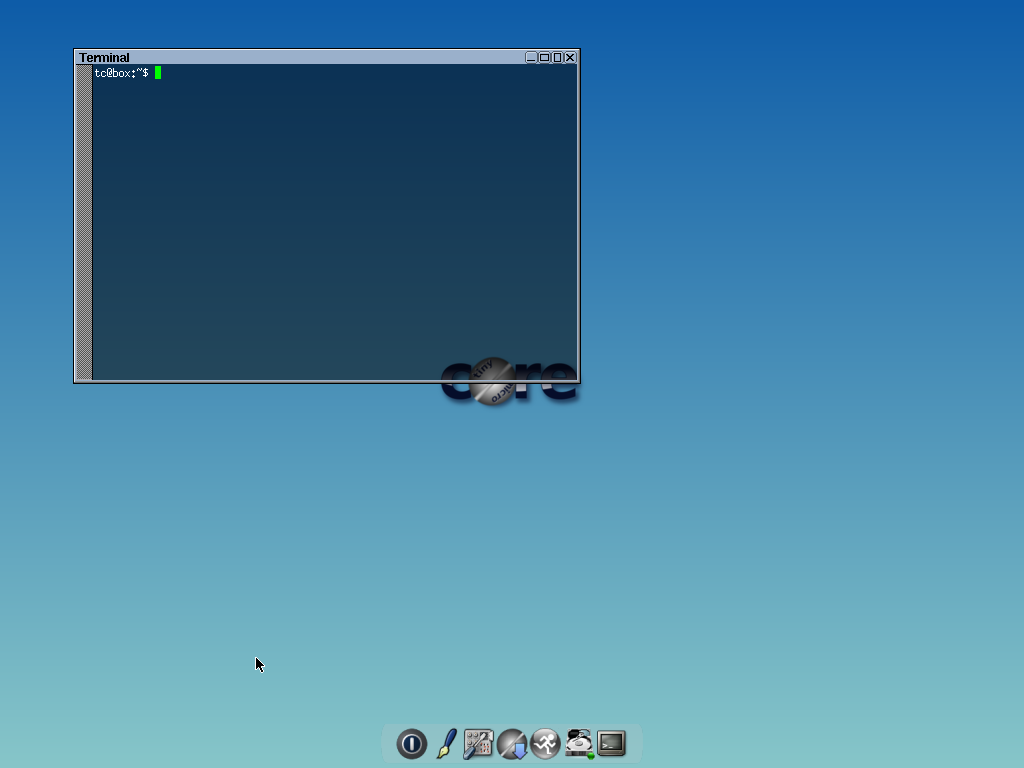
(a terminal is now open) Ping R1 from the TinyCore PC:
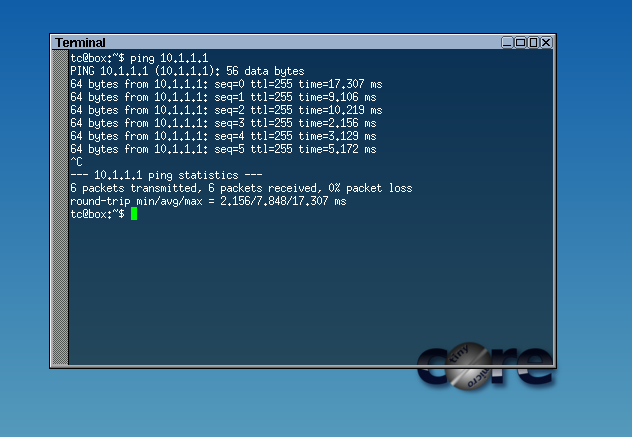
Result: The New TinyCore PC can ping the GNS3 router R1.
Congratulations! You have integrated a new VMware virtual machine with GNS3.
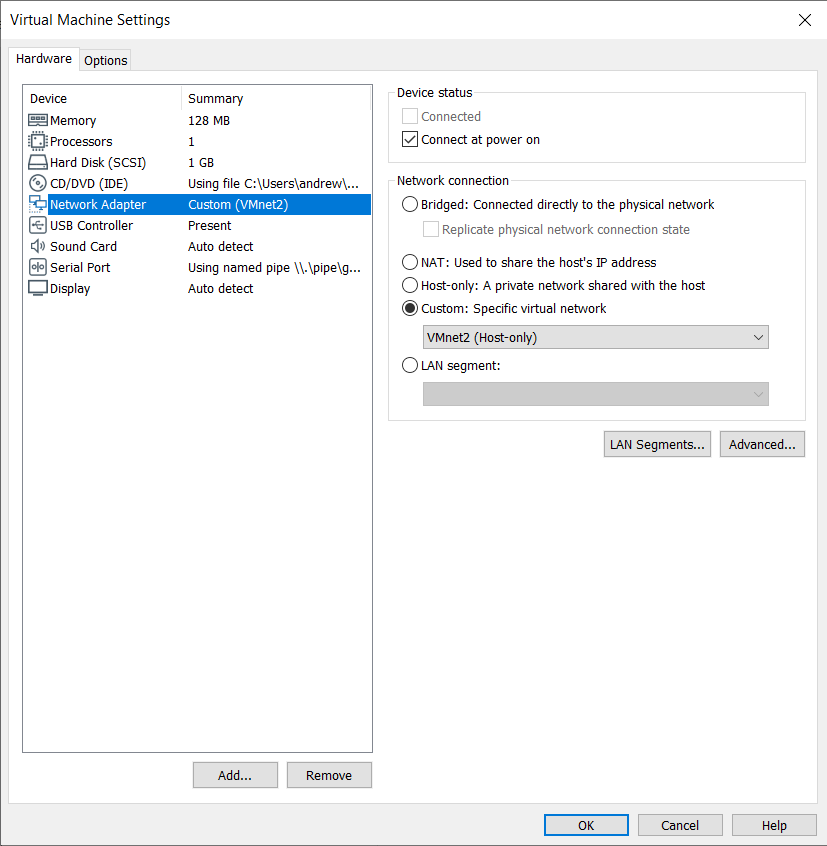
Addendum: If you’re curious to see which of those new host-only VMnets this particular virtual machine is using, click Edit virtual machine settings in VMware Workstation:
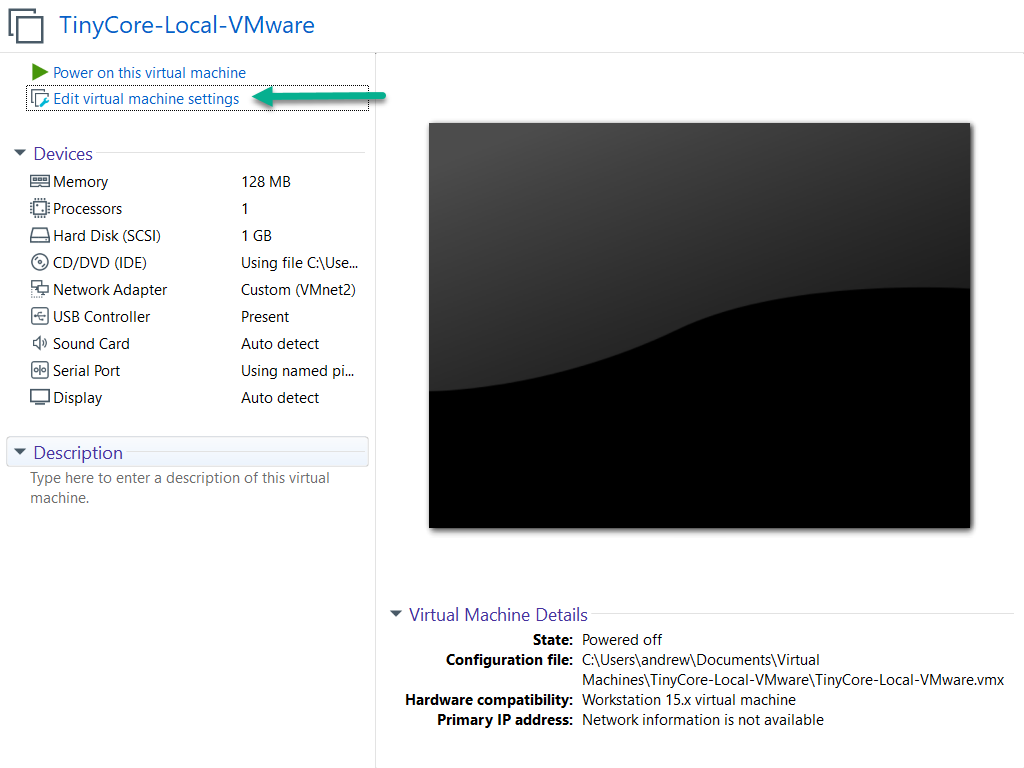
When you first created the TinyCore-Local-VMware virtual machine, it was set to use a NAT (VMnet 8) by default:
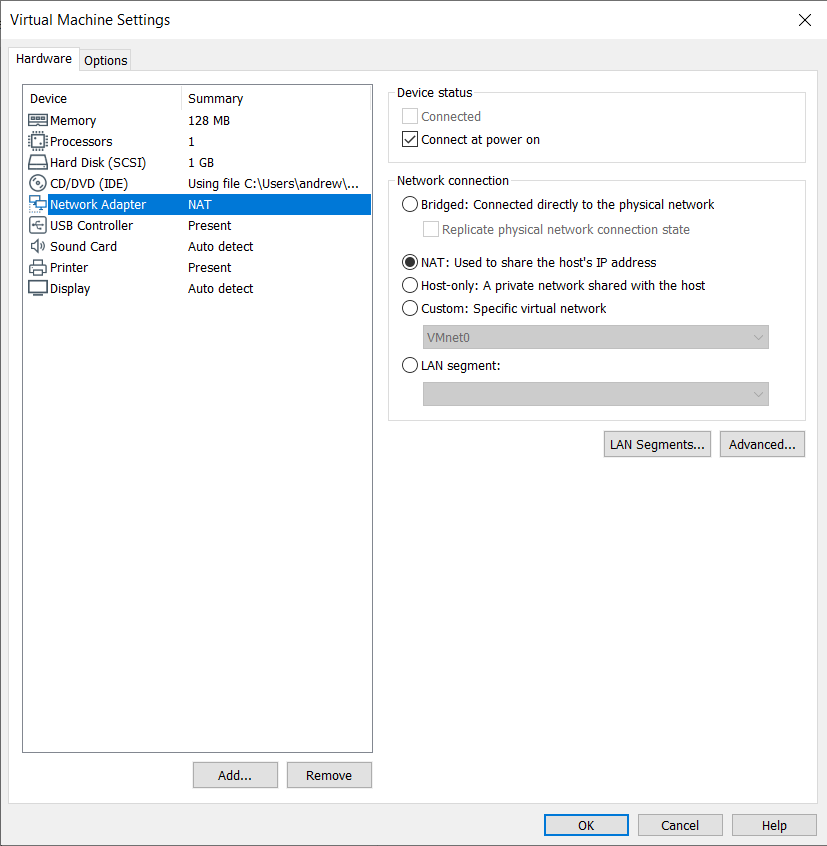
After importing this virtual machine into GNS3, adding it to a topology, and powering up, GNS3 happened to select Host-only VMnet 2, during the creation of this article:
Also note that GNS3 also created and configured a Serial Port (set to be connected at power on) for this VM, along with a Named Pipe:
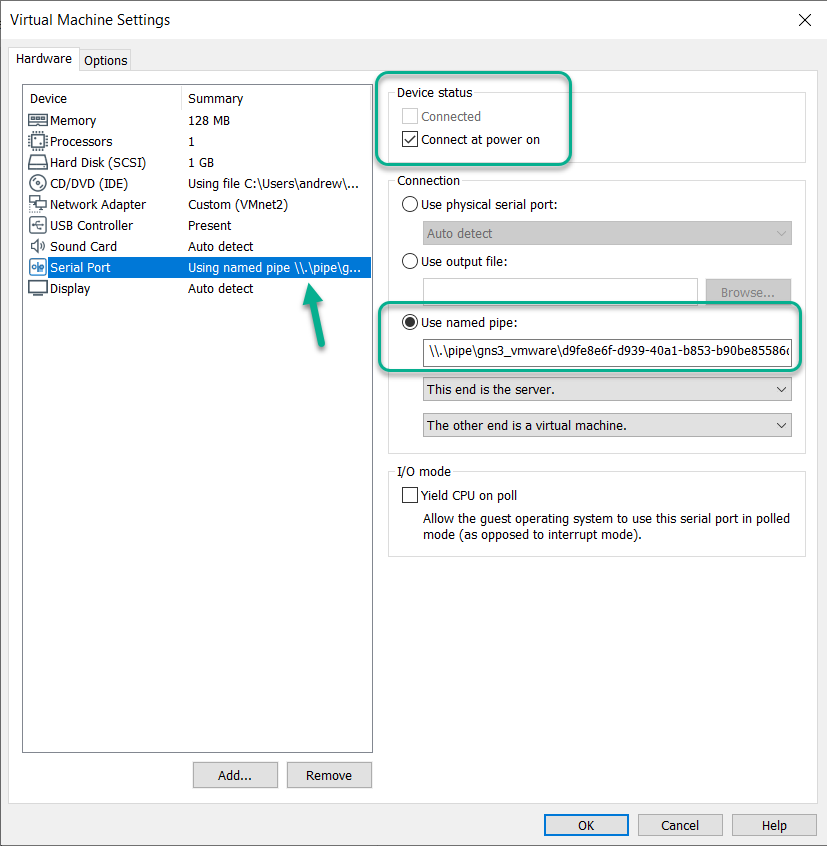
The named pipe is \\.\pipe\gns3_vmware\UUID
For more information on this, check the GNS3 Architecture article