GNS3 Mac Install
Introduction
This document explains how to install GNS3 using when a Mac OS X environment. You will learn how to:
- Download the required software
- Install the software
Supported Operating Systems
GNS3 officially supports the 3 latest versions of macOS (currently macOS 10.14 - Mojave to macOS 11.0 - Big Sur). GNS3 v2.1.9 is the last version that runs on OS X version 10.11 (El Capitan).
Download GNS3
Follow these steps to download GNS3 to you MAC. Using a web browser, browse to https://gns3.com and click the Free Download link:

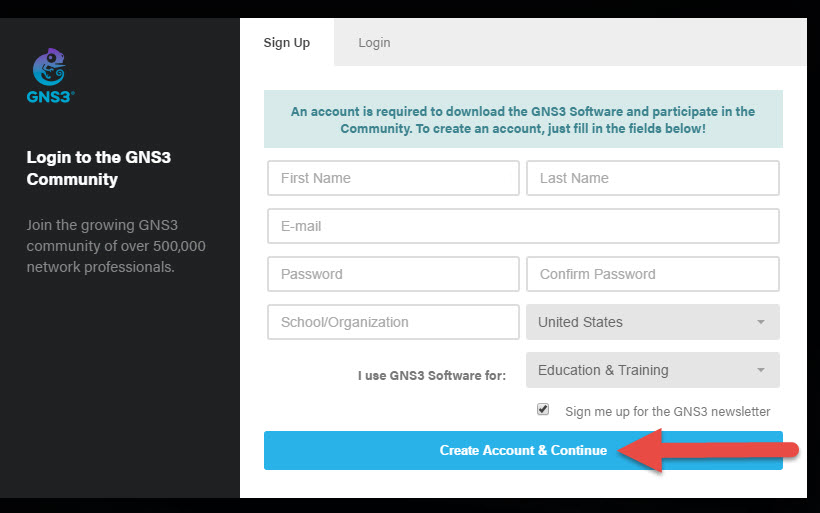
If you have not already registered on the GNS3 site, create an account and then click Create Account & Continue:
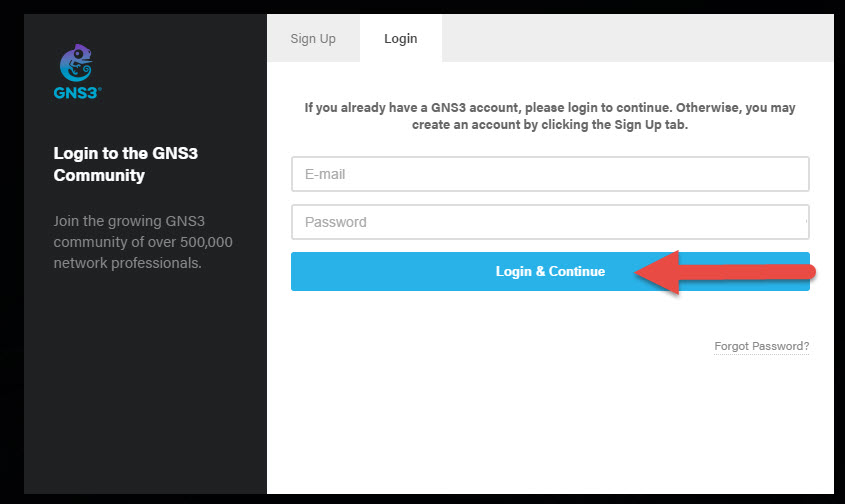
Or, if you already have an account, click Login, fill in the your details and then click Login & Continue:
After login, you will be prompted to select the version of GNS3 to download. In this guide, we will select the Mac installation. Click the Download button to download the Mac OS X package.
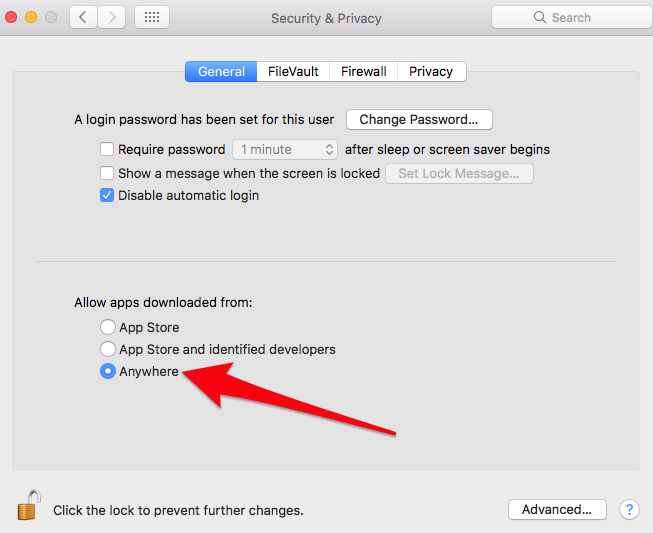
Allow installation of GNS3 before OSX Sierra
GNS3 is distributed outside the Apple App Store. Due to this, you need to allow the installation of applications from anywhere.
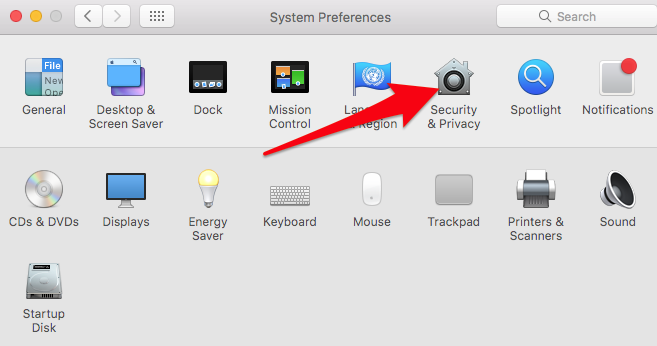
Go to the Security & Privacy in System Preferences.
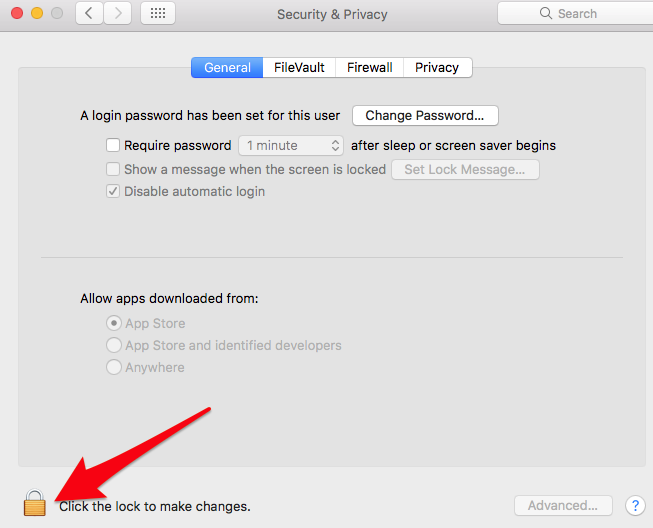
Click on the lock:
Select the Anywhere option under Allow apps downloaded from:
Installation of GNS3
Click on the downloaded DMG and drag the GNS3 icon to the Applications folder:
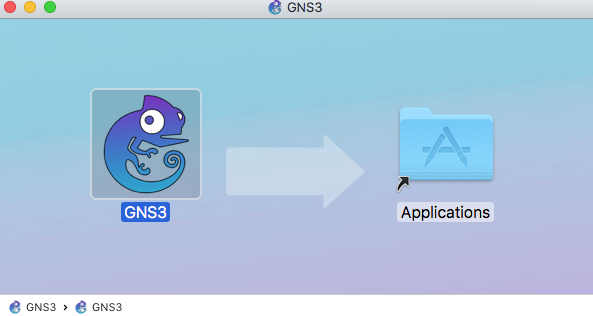
Click on the Applications icon. Find the GNS3 icon and click it to start GNS.
Make sure GNS3 is installed in “Applications” to avoid any problem. It has been reported that the application may crash if launched from a path containing non-ascii characters.
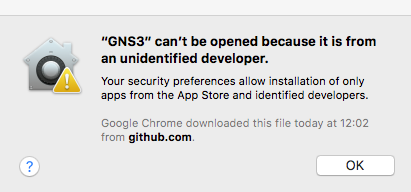
If the following security warning is displayed (starting with OSX Sierra), click OK:
If the above security prompt was shown, right click on the GNS3 icon and click on Open:
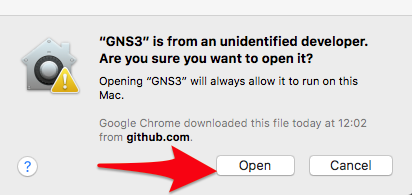
This is required only at first launch. The next time you click on GNS3, the application will start normally as Mac OS X will remember the configured security settings.
Unlike for Windows and Linux versions of GNS3, the Mac version of GNS3 is not signed due to Apple restrictions.
If OSX say the .dmg is damaged and even right click is not working you could need to temporary disable gatekeeper and renable it. This seem to reset a cache in the OS. https://www.tekrevue.com/tip/gatekeeper-macos-sierra/
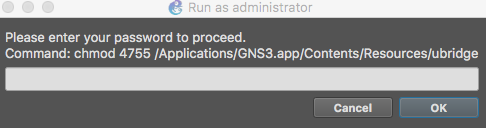
Once GNS3 starts, you will be prompted to allow root uBridge. This is required to allow GNS3 to control your network. Click Yes:

You will prompted twice to enter your root password:
GNS3 Setup Wizard
The GNS3 Setup Wizard will display:
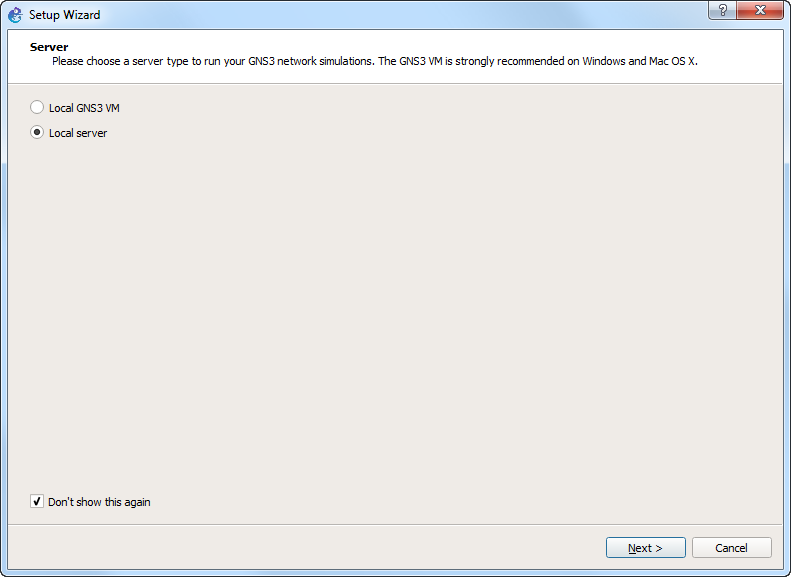
You now need to make a decision and then you can return to this document to complete to create an initial GNS topology:
- If you are unsure, click here
- If you are going to only use Cisco IOS images, use the Local server and click here for instructions
- If you are going to use IOSvL2, IOU, ASAv or create complex topologies, then use the GNS3 VM and click here for instructions.