GNS3 Windows Install
Introduction
This document explains how to install GNS3 using a Windows environment. You will learn how to:
- Download the required software
- Install prerequisite and optional software
Supported Operating Systems
GNS3 supports the following Windows operating systems:
- Windows 7 SP1 (64 bit)
- Windows 8 (64 bit)
- Windows 10 (64 bit)
- Windows Server 2012 (64 bit)
- Windows Server 2016 (64 bit)
Note: The 32 bit version is not discussed in this guide. For 32-bit CPU or older operating systems, please read this documentation.
Minimum Requirements
The following are the minimum requirements for a Windows GNS3 environment:
| Item | Requirement |
|---|---|
| Operating System | Windows 7 (64 bit) or later |
| Processor | 2 or more Logical cores |
| Virtualization | Virtualization extensions required. You may need to enable this via your computer's BIOS. |
| Memory | 4 GB RAM |
| Storage | 1 GB available space (Windows Installation is < 200 MB). |
| Additional Notes | You may need additional storage for your operating system and device images. |
The hardware requirements listed here are minimum requirements for a small GNS3 environment. If you want to create complex environments with many devices, your hardware requirements will increase.
Recommended Requirements
The following are the recommended requirements for a Windows GNS3 environment:
| Item | Requirement |
|---|---|
| Operating System | Windows 7 (64 bit) or later |
| Processor | 4 or more Logical cores - AMD-V / RVI Series or Intel VT-X / EPT |
| Virtualization | Virtualization extensions required. You may need to enable this via your computer's BIOS. |
| Memory | 16 GB RAM |
| Storage | Solid-state Drive (SDD) with 35 GB available space |
| Additional Notes | Virtualizing devices is processor and memory intensive. More is better but properly configured device trumps RAM and Processing power. |
The hardware requirements listed here are recommended for a small GNS3 environment. If you want to create complex environments with many devices, your hardware requirements will increase.
Optimal Requirements
The following are the optimal requirements for a Windows GNS3 environment:
| Item | Requirement |
|---|---|
| Operating System | Windows 7 (64 bit) or later |
| Processor | Core i7 or i9 Intel CPU / R7 or R9 AMD CPU / 8 or more Logical cores - AMD-V / RVI Series or Intel VT-X / EPT |
| Virtualization | Virtualization extensions required. You will need to enable this via your computer's BIOS. |
| Memory | 32 GB RAM |
| Storage | Solid-state Drive (SDD) with 80 GB available space |
| Additional Notes | Virtualizing devices is processor and memory intensive. More is better, but a properly configured device trumps RAM and processing power. |
If you want to create complex environments with many devices, your hardware requirements will increase.
Video
- Video: https://www.youtube.com/watch?v=x9pGYyEqLYs
- Video: https://www.youtube.com/watch?v=lFEDmM_lsxI
Download the GNS3 all-in-one-installer
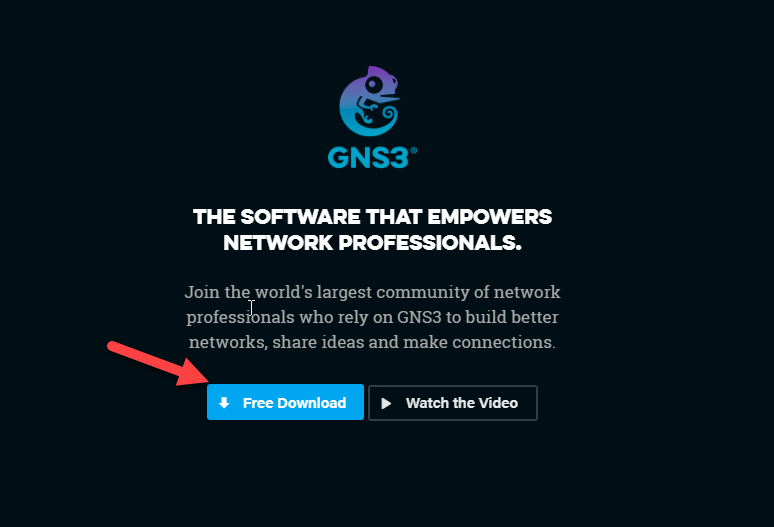
Follow these steps to download GNS3 to you MAC. Using a web browser, browse to https://gns3.com and click the Free Download link:
If you have not already registered on the GNS3 site, create an account and then click Create Account & Continue:
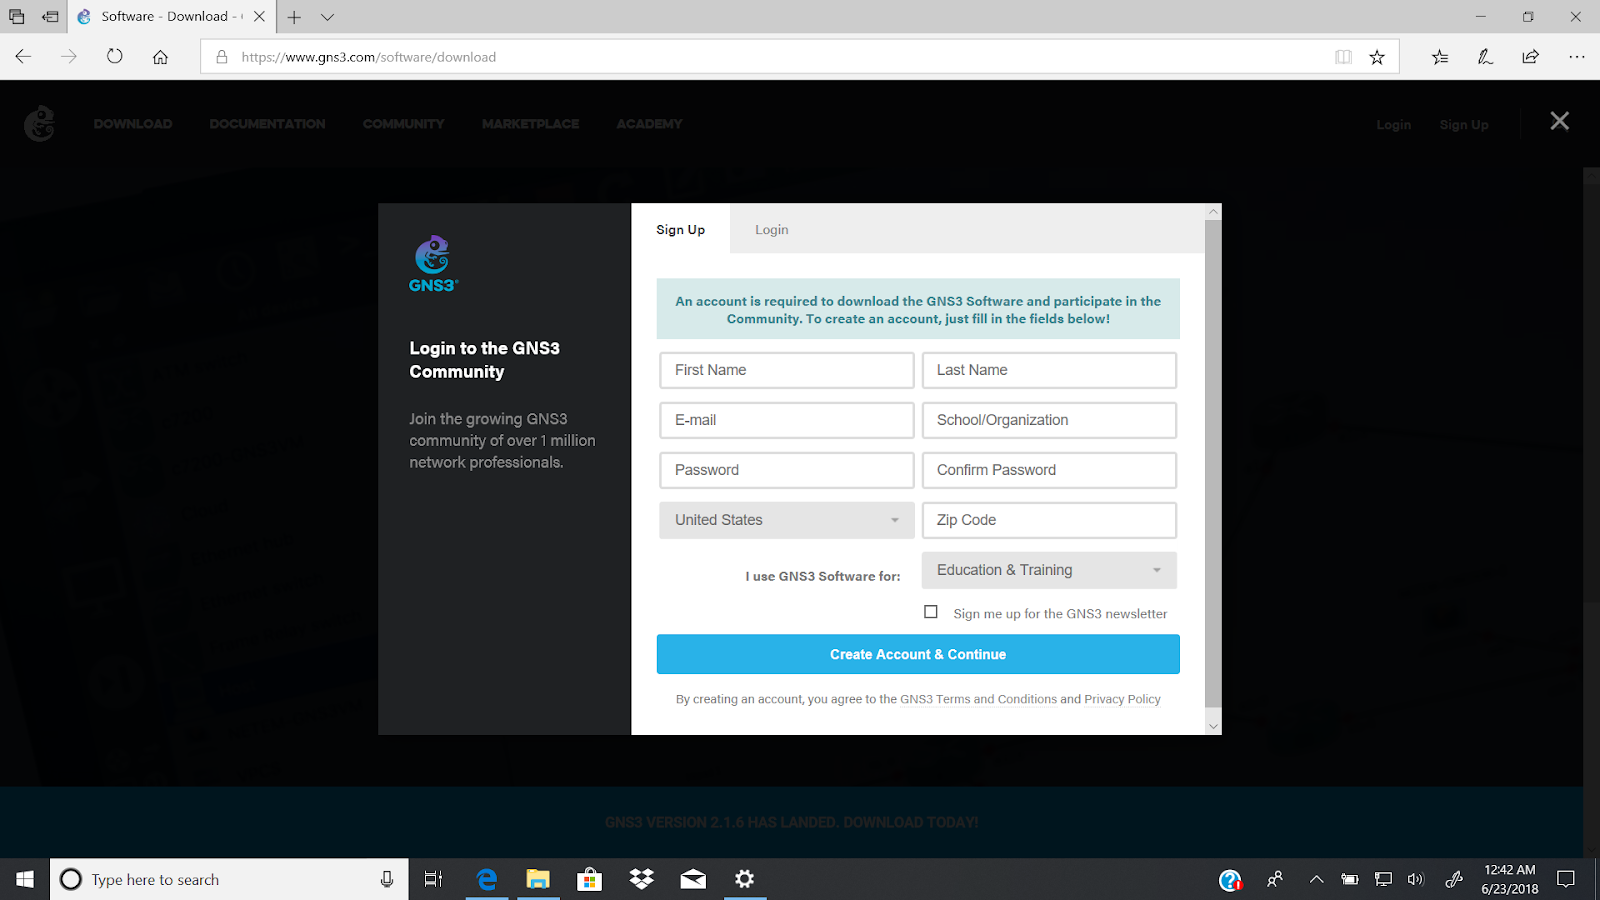
Or, if you already have an account, click Login, fill in the your details and then click Login & Continue:
After login, you will be prompted to select the version of GNS3 to download. In this guide, we will select the Windows installation. Click the Download button to download the GNS3-all-in-one package.
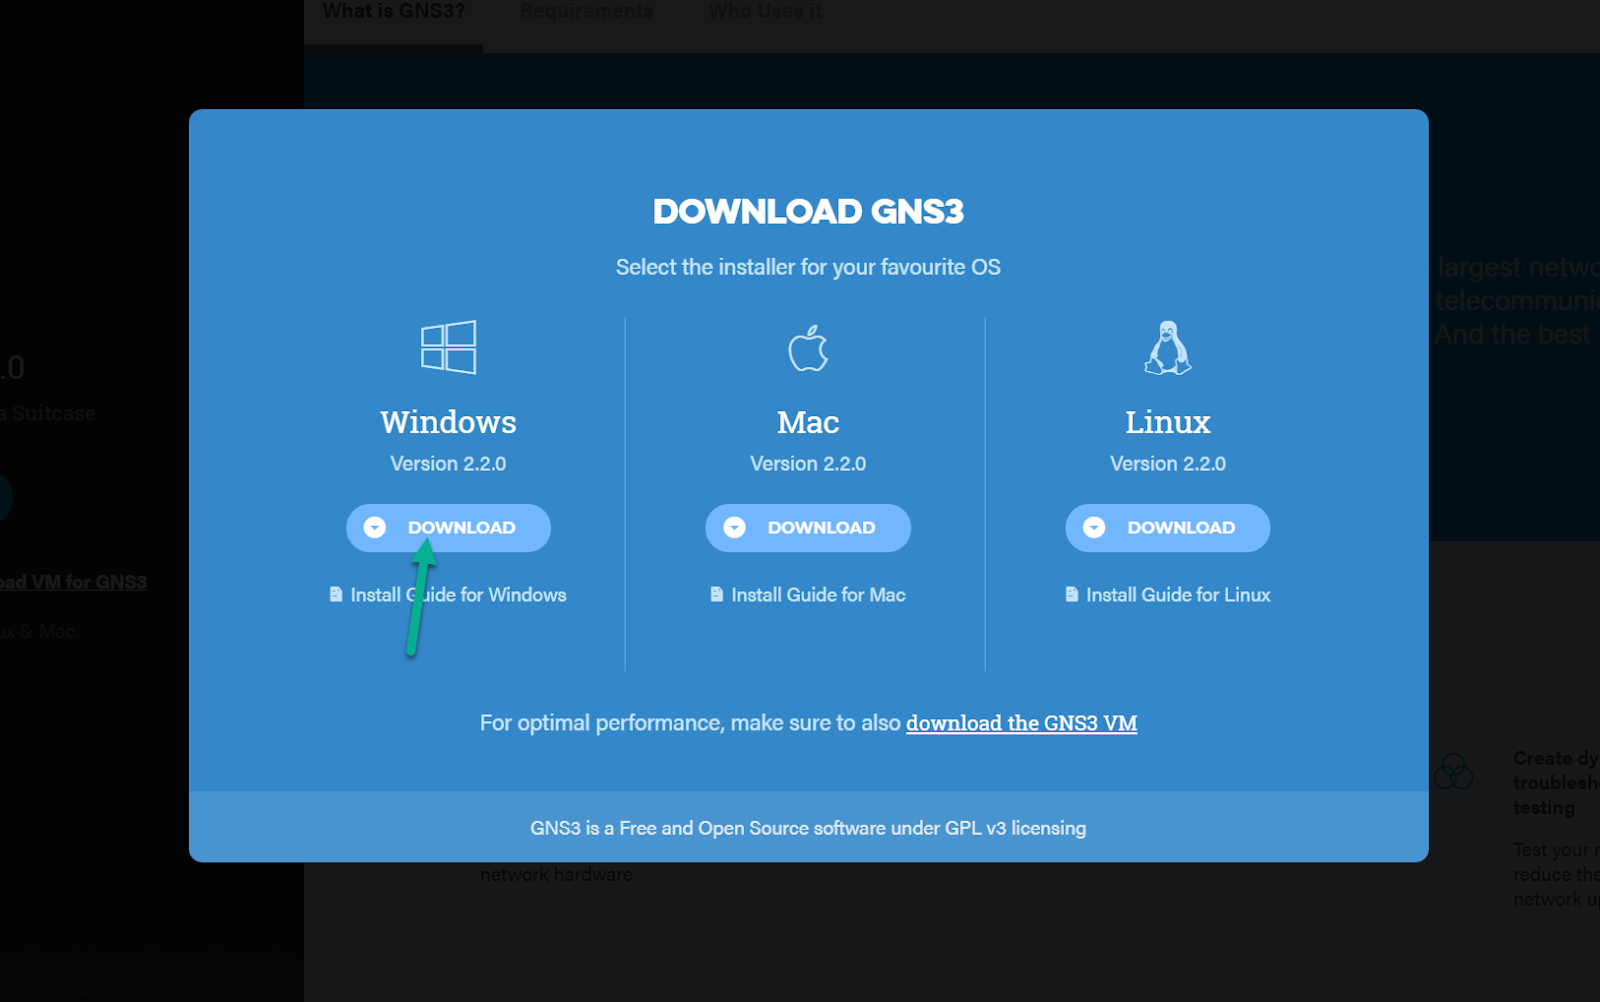
The GNS3 executable file is about 85MB in size. The amount of time it takes to download will depend on the speed of your Internet connection.
The GNS3 downloaded file is an executable Windows file. If you have issues downloading, ensure that your security policies such as firewall and antivirus rules allow for the downloading of .exe files.
The GNS3-all-in-one package will automatically be downloaded to your PC.
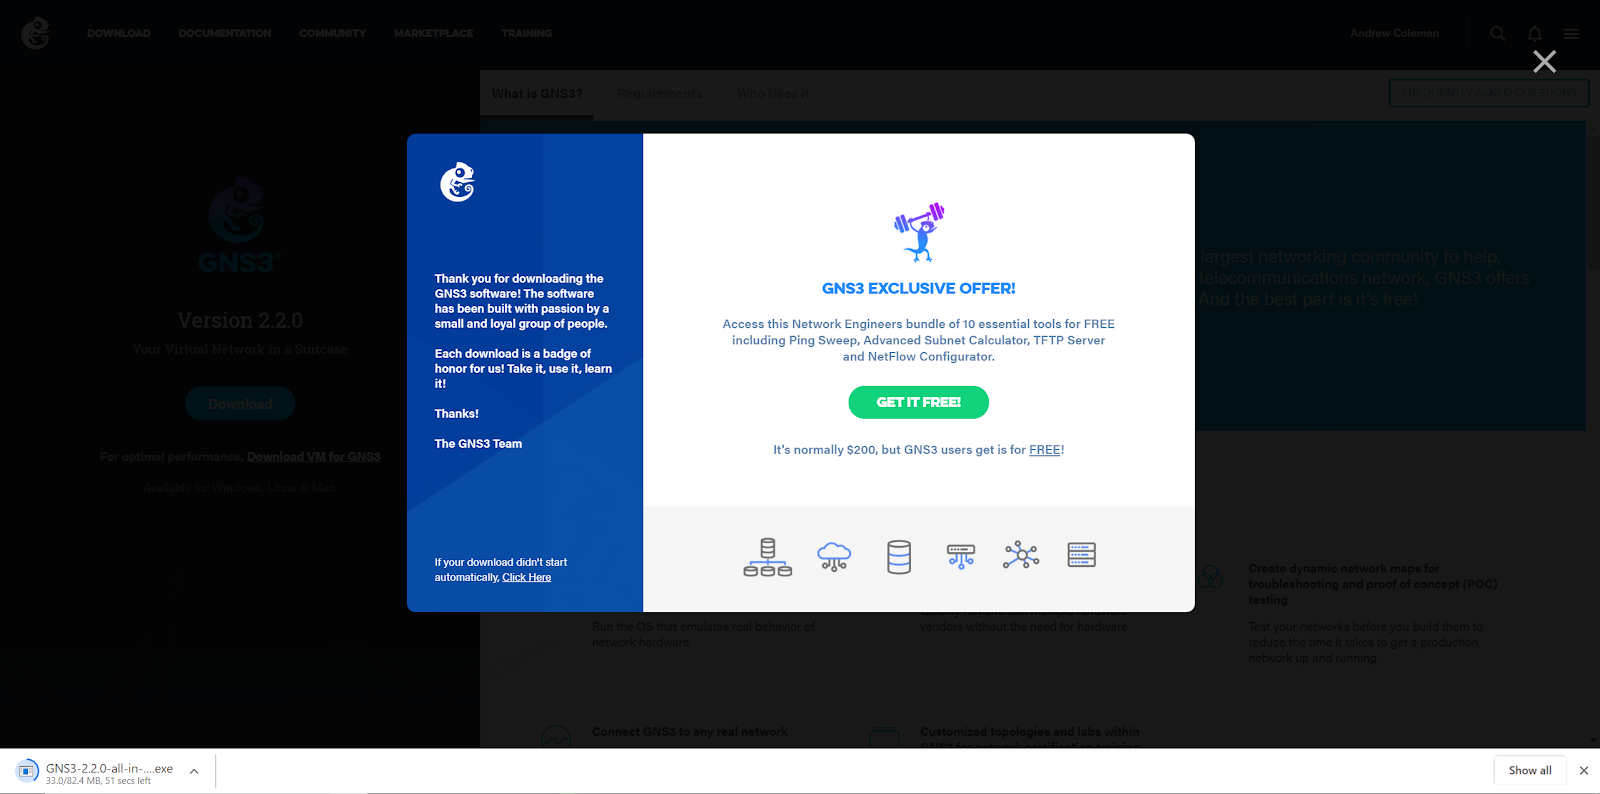
You also get an option to download a free version of the SolarWinds Network Engineers Toolkit (this is a subset of the full Pro version).
Install GNS3
Follow these steps to download GNS3 on a local Windows PC.
This guide only discusses a local Windows installation (Dynamips). If you are using the GNS3 VM, please refer to the GNS3 VM installation guide.
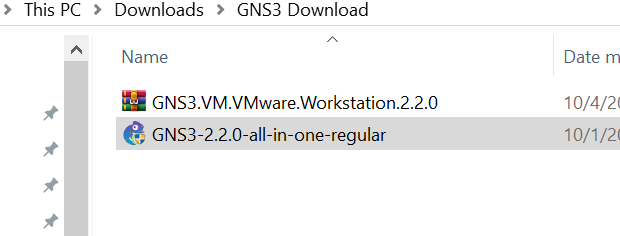
Navigate in Windows Explorer to your Downloads folder and then double-click the GNS3-2.2.0-all-in-one-regular.exe file:
If you have configured your browser to download files to a different directory to the default Downloads directory, look for the GNS3-2.2.0-all-in-one-regular.exe file (or the version of file you downloaded) in that directory.
If displayed, click the Run button to start the GNS3 installation (it’s not possible to take a screenshot of the UAC prompt for this, but allow setup to continue)
The GNS install process will run multiple installation wizards. If the process seems to have stalled, check if additional windows have been opened that are waiting for your input.
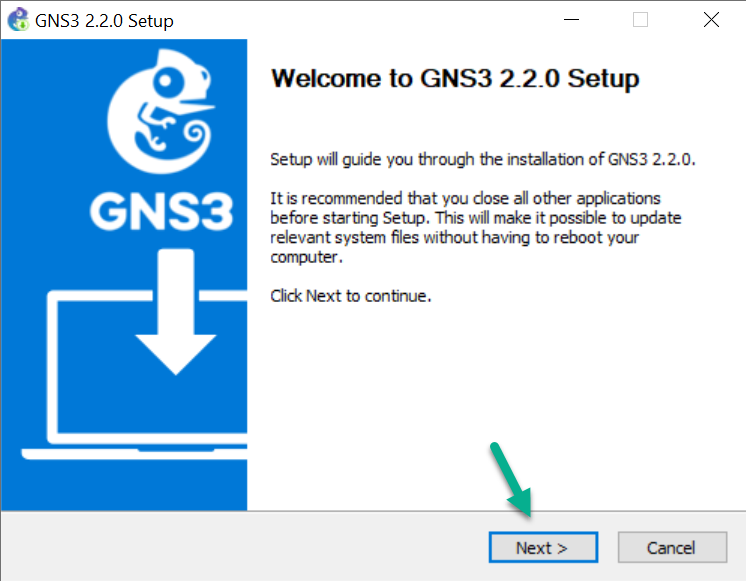
The GNS3 Setup wizard displays. Click Next > to start the installation:
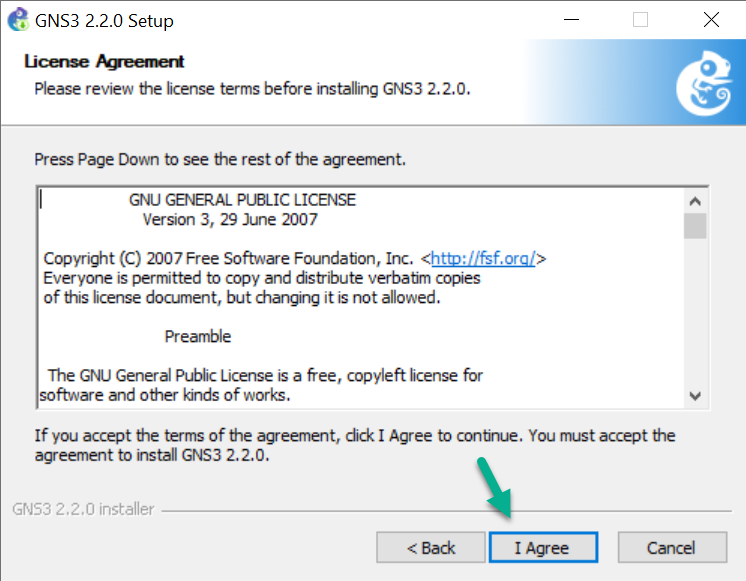
GNS3 is free open source software distributed under the GNU General Public License Version 3. Read the license agreement, and if you agree with the contents, click the I Agree button to continue the installation:
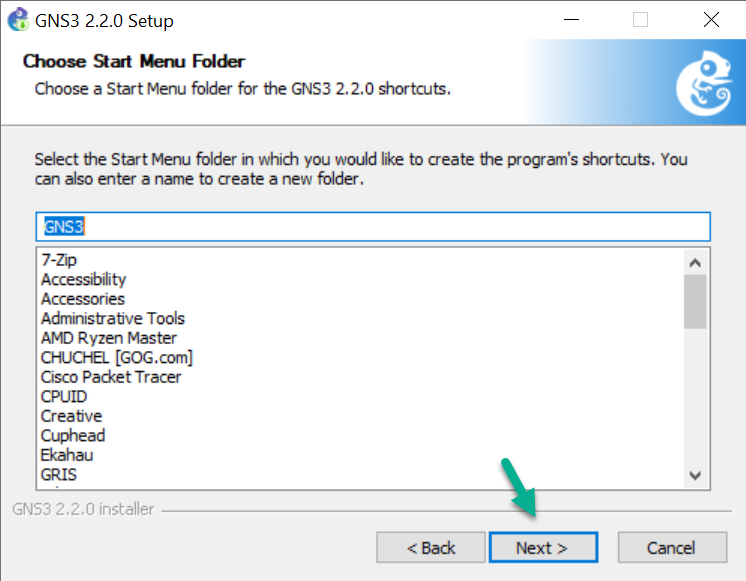
Select the Start Menu folder for the GNS3 shortcut. The default is the GNS3 folder. Click Next > to continue the installation:
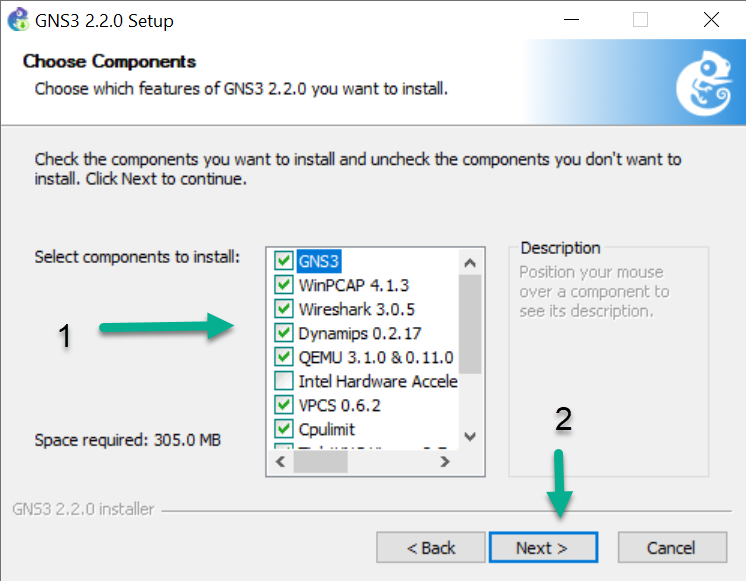
GNS3 comes bundled with various prerequisite and optional software. By default most software is selected for installation, but you can decide to only install specific software.
If you are unsure, leave all software selections at their default selection and click Next > to continue the installation:
Recent versions of Windows 10 have an issue with WinPcap. If Wireshark hangs while trying to use it in a GNS3 topology, consider switching to Npcap instead. Instructions can be found lower down in this document.
Here is a brief description of software:
| Item | Required | Description |
|---|---|---|
| WinPCAP | Required | Required to connect GNS3 to your computer network. Used by Cloud and NAT nodes to allow your projects to communicate with the outside world. |
| Npcap | Optional | Modern replacement to WinPCAP know to fix issues with Win10 but is less tested than WinPCAP. Install Npcap with the “WinPcap API-compatible Mode” option selected, if using without WinPcap. Npcap can co-exist with WinPcap, if that option is not selected. |
| Wireshark | Recommended | Allows you to capture and view network traffic sent between nodes. |
| Dynamips | Required | Required to run a local installation of GNS3 with Cisco routers. Only unselect if you are going to exclusively use the GNS3 VM. |
| QEMU 3.1.0 and 0.11.0 | Optional | A computer emulator used to emulate a full computer which could for example be Linux. The older Qemu version 0.11.0 is installed in order to support old ASA devices. It is recommended to use the GNS3 VM instead. |
| VPCS | Recommended | A very light PC emulator that supports basic commands like ping and traceroute |
| Cpulimit | Optional | Used to avoid QEMU using 100% of your CPU (when it is running) in some cases like with the old ASA devices |
| GNS3 | Required | The core GNS3 software. This is always required. |
| TightVNC Viewer | Recommended | A VNC client used to connect to appliance graphical user interfaces. |
| Solar-Putty | Recommended | The new default Console application. |
| Virt-viewer | Recommended | Alternate displayer of Qemu desktop VMs that have qemu-spice pre-installed. |
| Intel Hardware Acceleration Manager (HAXM) | Optional | Only available on systems with Intel CPUs (and VT-X enabled), that are not using Hyper-V. Used for hardware acceleration of Android emulation, as well as QEMU. |
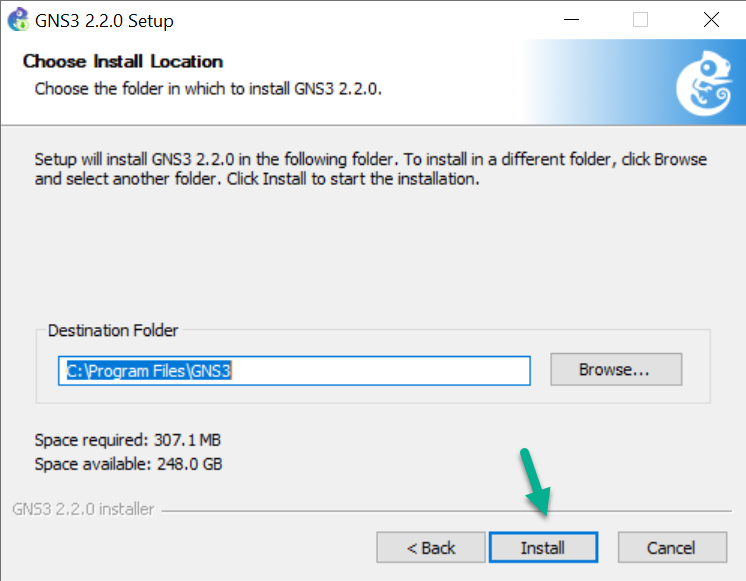
Choose an install location. The default location is C:\Program Files\GNS3. Then click Install:
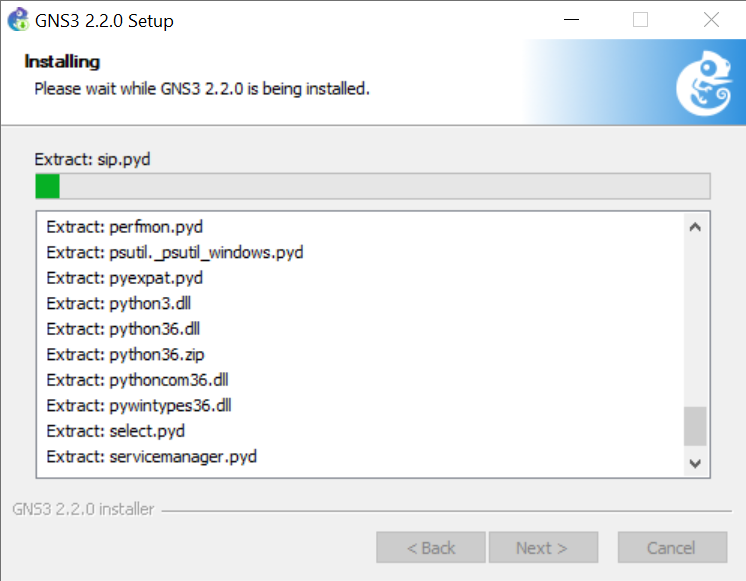
The output displayed will depend on what you have selected to install.
- If you are new to GNS3 and this is a new install, go to the next step.
- For WinPCAP install instructions go to the next step.
- For Wireshark install instructions
- For SolarWinds Response Time Viewer install instructions
- For GNS3 install instructions
If WinPcap is already installed, a warning message is displayed. It is not necessary to reinstall WinPcap. Click Cancel if you do not want to reinstall WinPcap and go directly to the next step. Click OK to continue re-installing WinPcap:

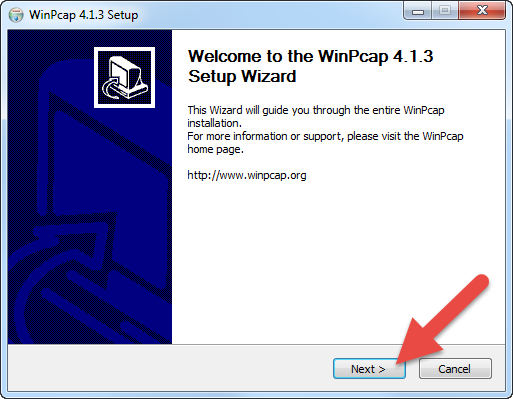
The WinPcap installation wizard displays. Click Next > to continue the installation:
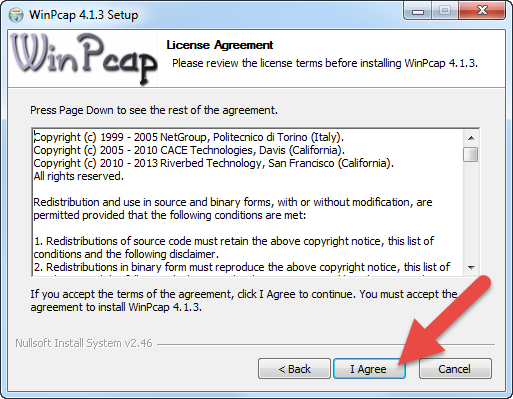
The WinPcap License Agreement displays. Read the agreement and if you agree, click the I Agree button to continue with the installation:
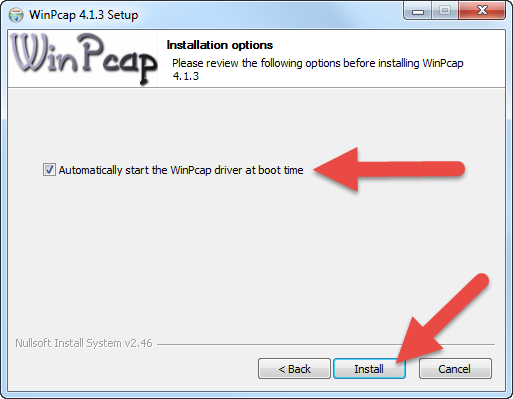
Leave the checkbox Automatically start the WinPcap driver at boot time checked and click Install:
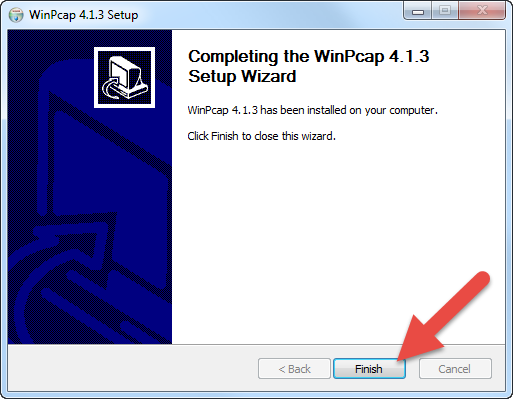
The WinPcap installation continues. Click Finish to complete the installation:
If you selected that Wireshark should be installed, the GNS3 setup software will download the Wireshark install files. Wait for the process to complete:
GNS3 will then perform a silent install of Wireshark. Wait for the process to complete:
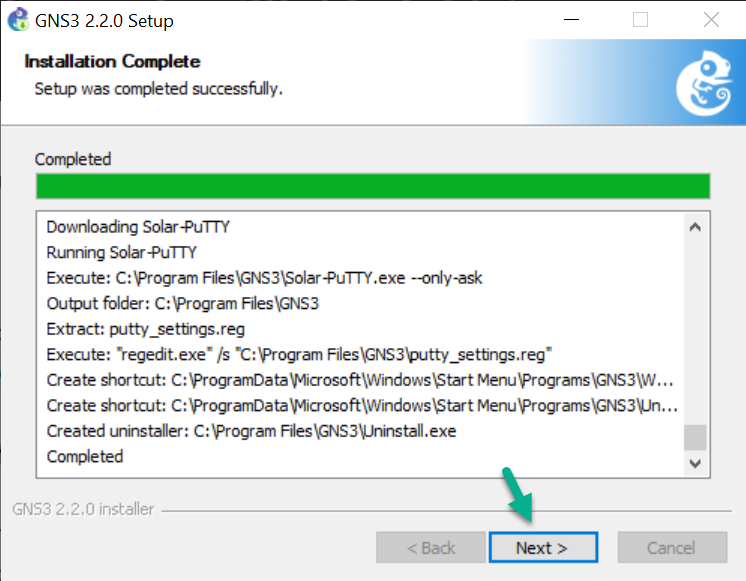
Once the core GNS3 software (and any optional selected items) is installed, Click Next>
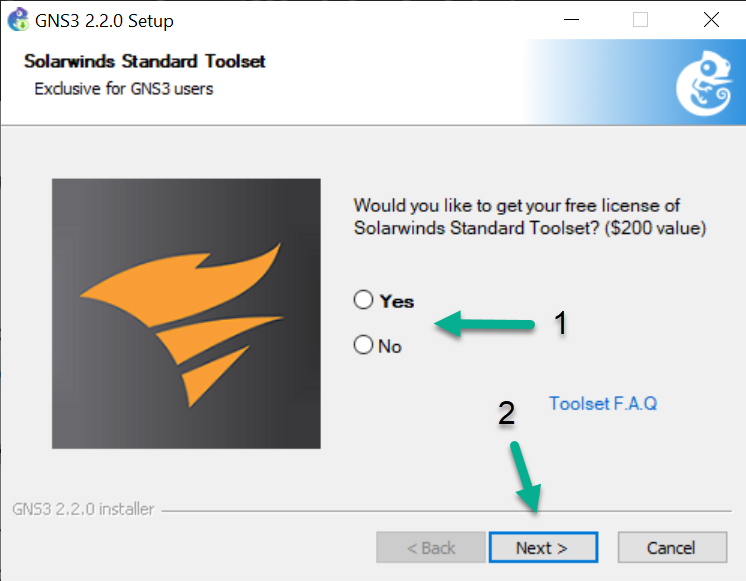
Optional: If you are interested, install the Solarwinds Standard Toolset. This is free evaluation (a $200 value). Otherwise Select No and click Next > to continue:
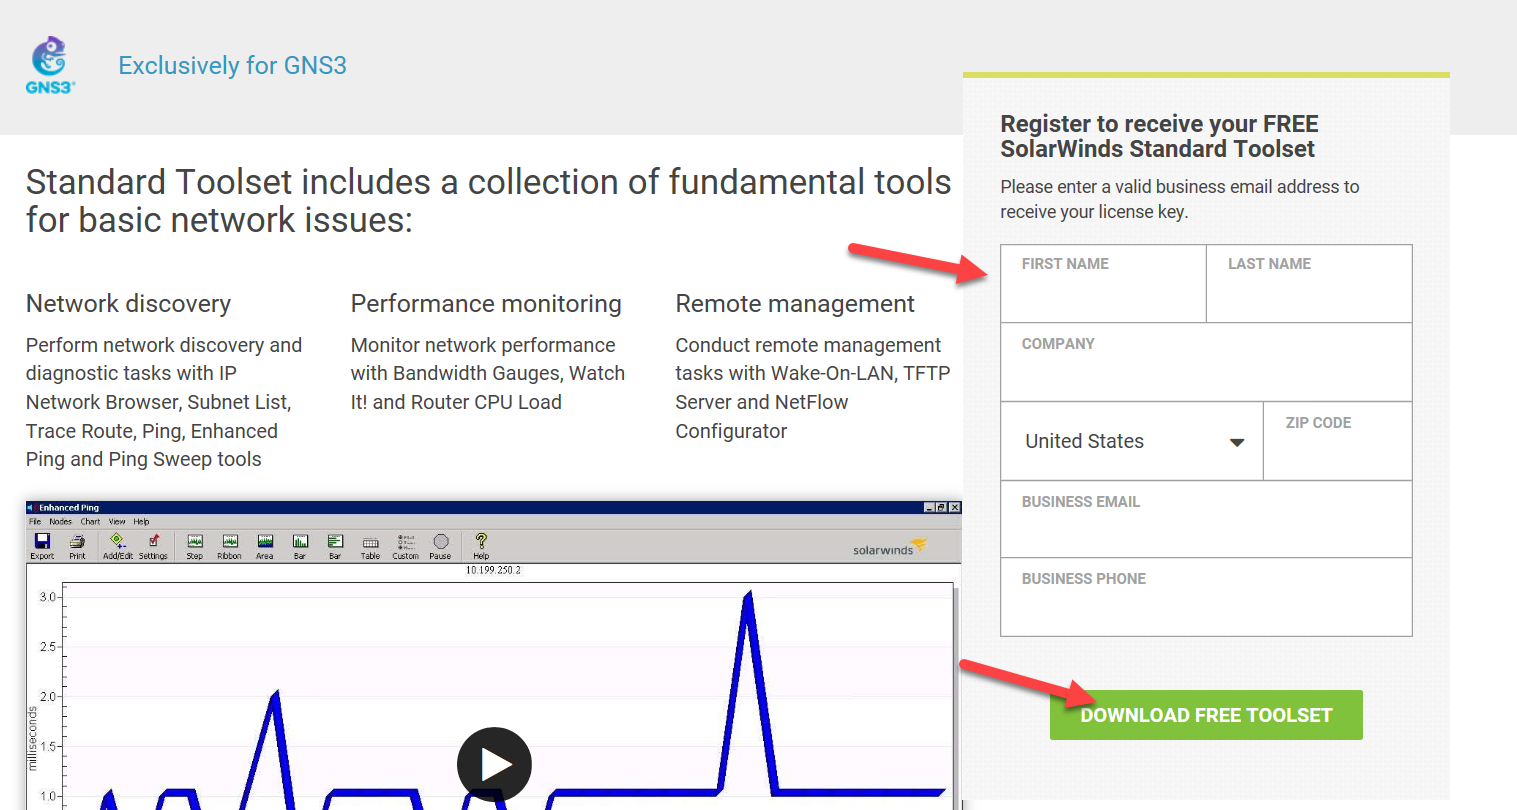
If you elect to download the Standard Toolset, you’ll be redirected to a webpage on Solarwinds, where you enter registration information, in order to download the software:
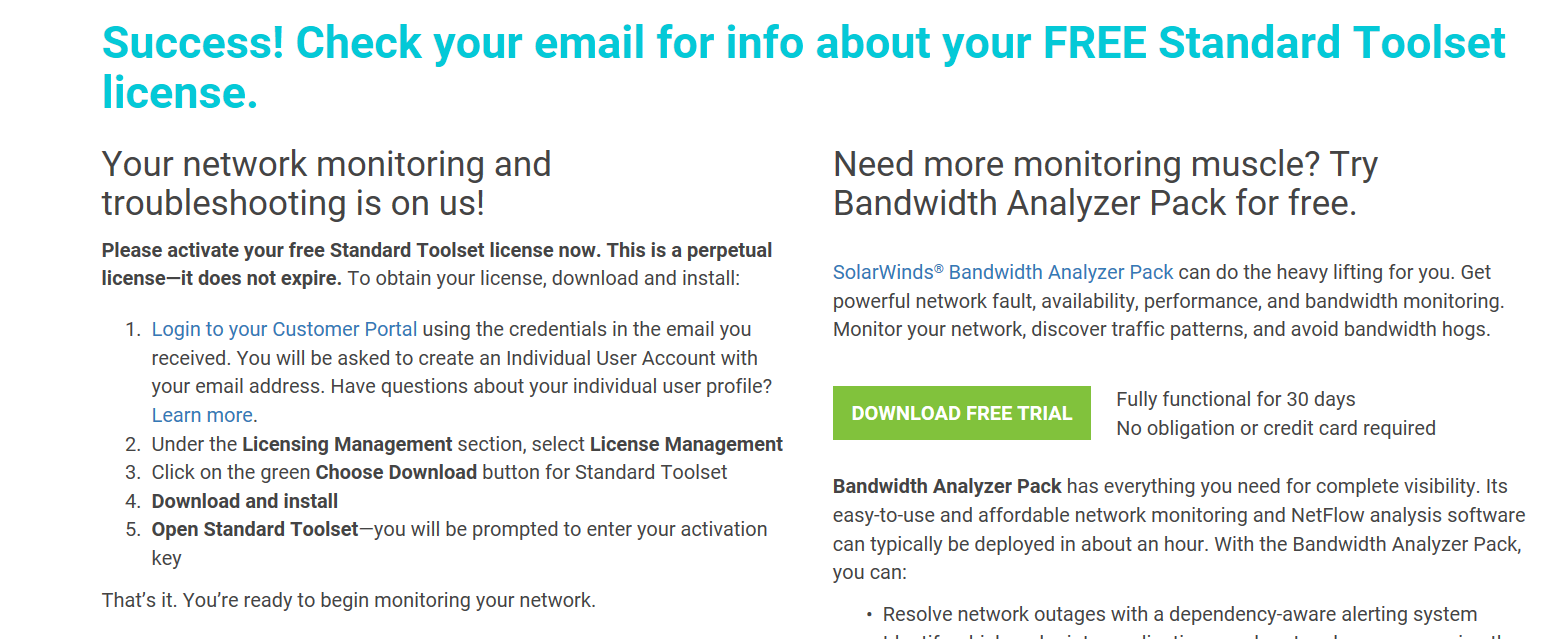
After registration and clicking the Download Free Toolkit link, you’ll be redirected to an informational page asking that you check your email, as well as instructions on how to activate your license for the Standard Toolset:
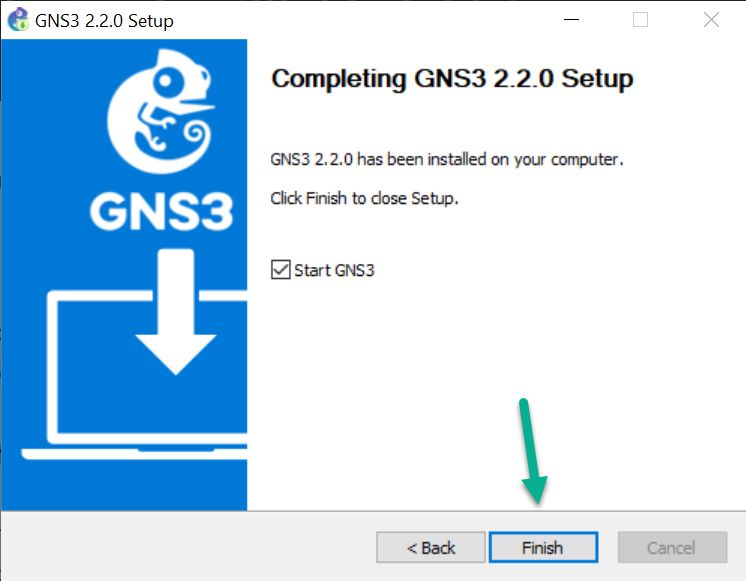
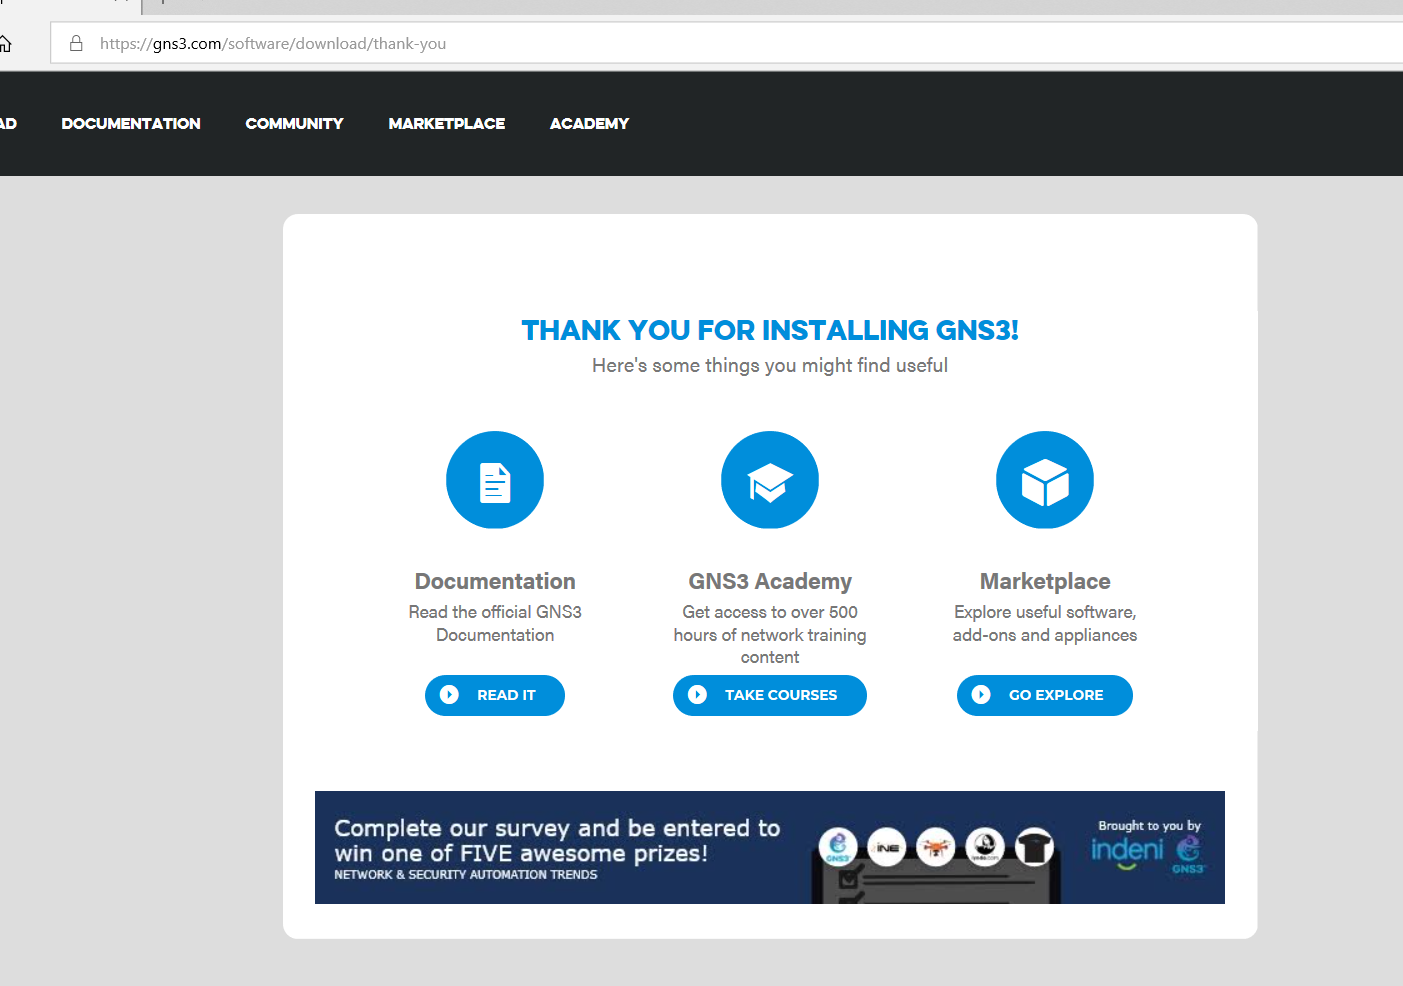
Congratulations! You have successfully installed GNS3. A browser window will open showing additional help and options. Leave the Start GNS3 checkbox enabled and click Finish to complete the GNS3 installation. Click here to for a walkthrough of using the Setup Wizard to configure and use the Local Server.
If you intend on using the GNS3-VM to run your devices, the please leave this window open and minimized in your taskbar, proceed with importing the GNS3-VM first (please click here to see those steps), and then come back to complete this step once the GNS3-VM has been imported.
If you are running Win10 with the latest updates, and experience issues with Wireshark hanging while trying to initialize interfaces, it’s worth giving the most recent Npcap a shot.
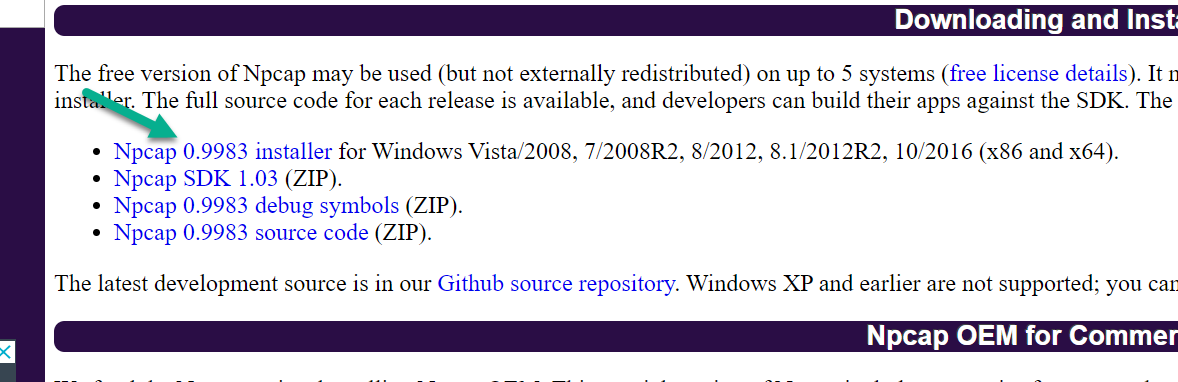
First, uninstall WinPcap and reboot. Next, either re-run the GNS3 All-In-One installer (ncap v0.9982 is included as an optional install), or open up your web browser and navigate to www.nmap.org/npacp/.
Scroll down the page a little bit, and look for the most recent version (v0.9983 as of Oct 7th, 2019):
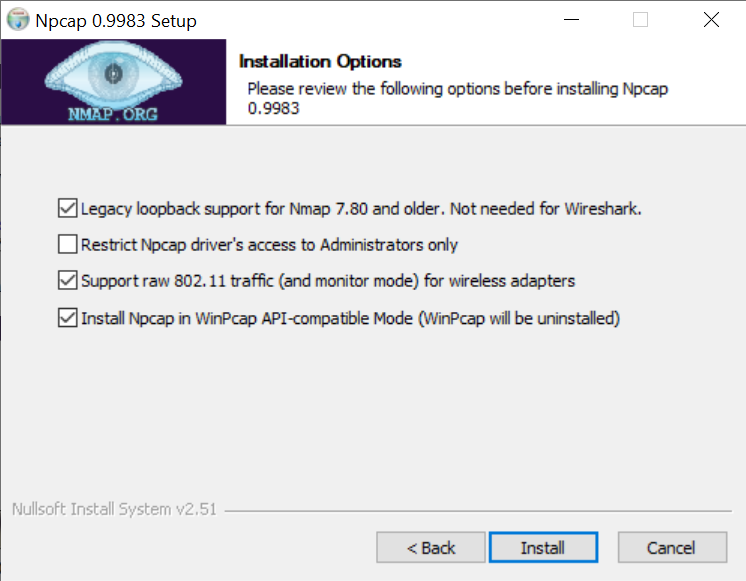
When installing Npcap with WinPcap, make sure to enable the “WinPcap API-compatible Mode” option before completing the installation:
Click Install, and then reboot Windows a final time.
If you do wish to also have WinPcap installed, make sure that “WinPcap API-compatible Mode” is not selected, so that they can co-exist.
If you wish to install Npcap before installing GNS3, you’re free to do so. Just ensure that the options to install WinPcap and Npcap as part of the GNS3 installation process are deselected
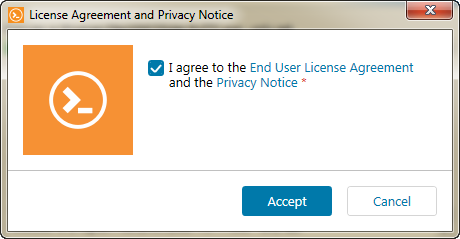
Solar-Putty is now the new default terminal emulation application for GNS3 in Windows, if you downloaded the GNS3 AIO installer from gns3.com (see note 3) . During GNS3 installation, if you elected to install Solar-Putty, you’ll be prompted to accept a License Agreement and Privacy Notice:
After clicking ‘Accept’, you’ll be prompted to enter a valid email address:
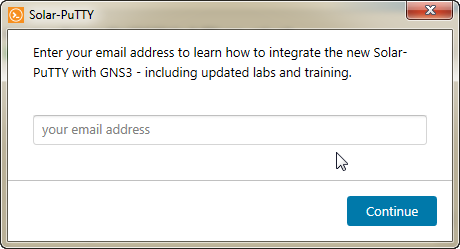
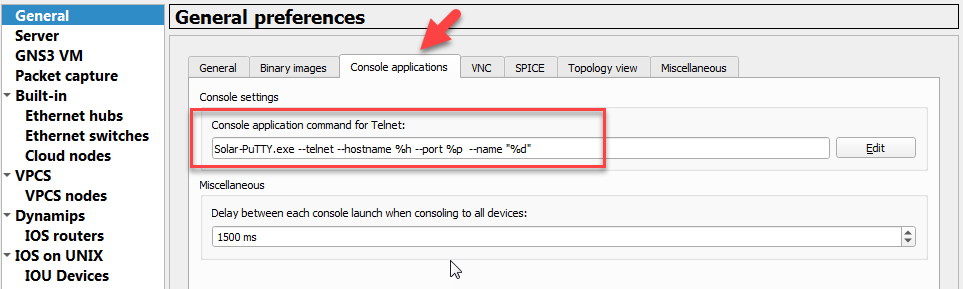
Clicking Continue will finish this part of the installation, and takes you back to the main GNS3 installation. Solar-Putty will now be the default console application, unless you choose to select a different one, by click Edit->Preferences->GNS3->Console in the main GNS3 GUI:
David Bombal has several videos online, showing Solar-Putty in general, along with configuration changes you can make:
- Video: https://www.youtube.com/watch?v=3utfGQyQOkA
- Video: https://www.youtube.com/watch?v=iuev1Hyc-f4
- Video: https://www.youtube.com/watch?v=mQKbXMIxHSk
- Video: https://www.youtube.com/watch?v=Q2TnxcJa0wI
- Video: https://www.youtube.com/watch?v=shoDldraAsE
GNS3, as well as the various versions of the GNS3 VM and the source code can also be downloaded from Github. This version of the Windows GNS3 AIO installer does not include Solar-PuTTY by default, and will use the original PuTTY instead.
You can still use Solar-PuTTY with GNS3 as your terminal emulator if you wish, by downloading it directly from SolarWinds. It’s still free to use (registration required). It will download as a .zip archive. You can then extract the Solar-PuTTY executable file from the .zip archive, and copy/paste that file into the main GNS3 installation directory (C:\Program Files\GNS3 by default). In the GNS3 GUI, click Edit->Preferences->GNS3->Console, and select Solar-PuTTY from the dropdown menu, to make it the default terminal emulator.