Install GNS3 on a remote server
If you need more resources for bigger topologies, you can install GNS3 on a remote server. This could be on:
- your own server
- a bare metal hosting provider
- a cloud provider
Most cloud providers (AWS, Azure...) block access to the CPU virtualization instructions and your VM will be slow and may not work when using Qemu. This limitation is due to the fact that you are already in a VM (nested virtualization)
Run these instructions only on a server dedicated to GNS3 otherwise you need to manually setup GNS3 on your server.
The easiest way to install GNS3 on this server is to install it on a fresh Ubuntu 18.04 LTS installation.
Ubuntu 16.04 LTS is deprecated, you will receive a warning similar to the following: 'DEPRECATION WARNING This Linux distribution (ubuntu xenial) reached end-of-life and is no longer supported by this script.'
As root run these commands:
cd /tmp
curl https://raw.githubusercontent.com/GNS3/gns3-server/master/scripts/remote-install.sh > gns3-remote-install.sh
bash gns3-remote-install.sh --with-openvpn --with-iou --with-i386-repository
This will install all the required packages and setup a VPN. When the installation is done, reboot the server. The details of arguments that you can pass to the script are:
- --with-openvpn: Install Open VPN to allow access over insecure network
- --with-iou: Install IOU
- --with-i386-repository: Add i386 repositories require by IOU if they are not available on the system. Warning this will replace your source.list in order to use official ubuntu mirror
- --help: Show the help
- --unstable: Use the unstable repository (for installing beta, release candidate…)
The options with-i386-repository is required only for certain providers where the ubuntu mirror doesn't include 32 bits package (example: Equinix Metal) but you can use it without problem on any host. The 32 bit package are require for IOU.
Why a VPN?
If the server is exposed on the internet, you need to setup a VPN to avoid anybody taking control of your GNS3 and the emulators. GNS3 itself could be secured via user and password over HTTPS but because you need to be able to telnet on the routers we need to expose their console on the network. That's why we highly recommend to use a VPN to protect the access to the telnet console .
VPN Setup
The next time you log in you will see this message:
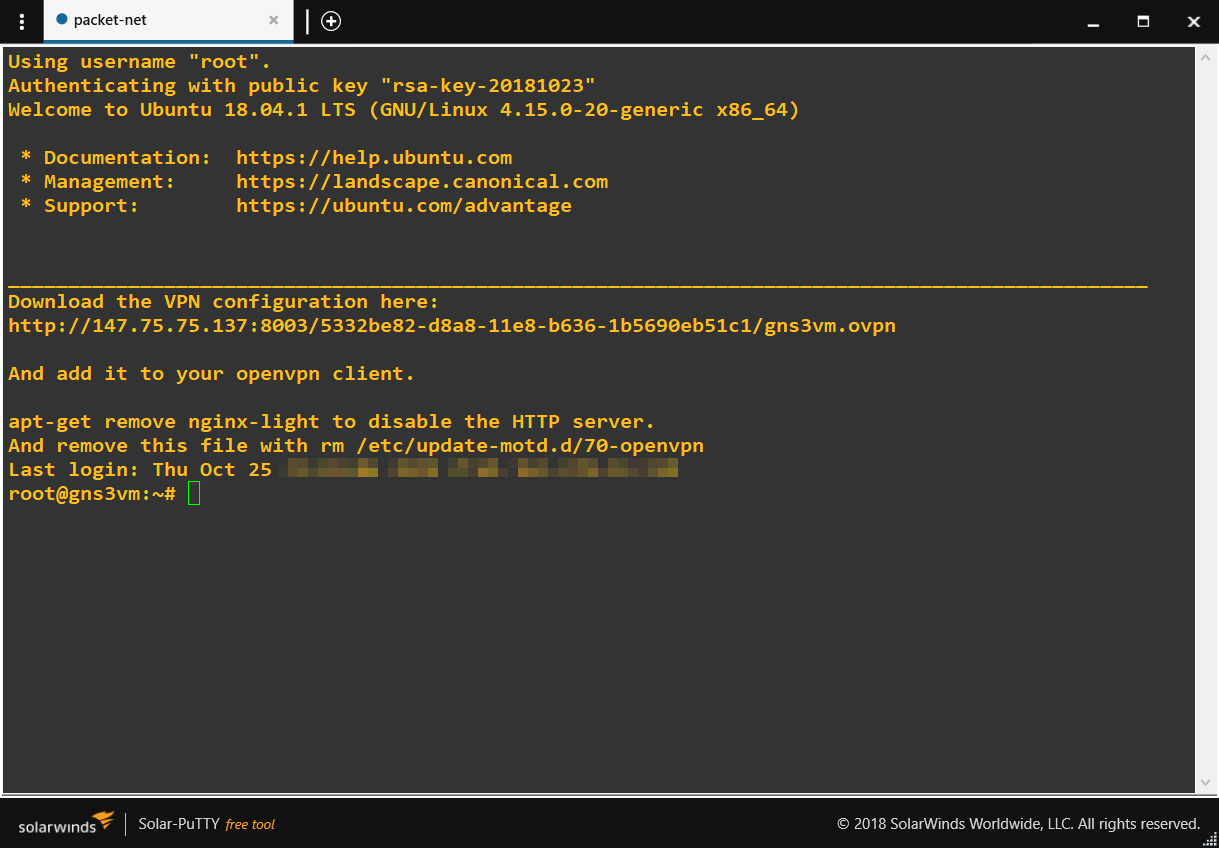
Download the certificate. You can also find the certificate in /root/client.ovpn
VPN connection on Linux
# sudo apt-get install openvpn
# sudo openvpn client.ovpn
Tue Apr 25 17:12:48 2017 [OpenVPN] Peer Connection Initiated with [AF_INET]X.X.X.X:1194
Tue Apr 25 17:12:51 2017 TUN/TAP device tun0 opened
Tue Apr 25 17:12:51 2017 Initialization Sequence Completed
If the VPN works, this page should work: http://172.16.253.1:3080/
VPN connection on Windows
Download and install OpenVPN for Windows (be careful to use the version associated with your OS version)
https://openvpn.net/index.php/open-source/downloads.html
- Click on “Show Hidden Items” in the Taskbar
- Right-click on “OpenVPN-GUI”, and select “Import file”
- Select the .ovpn file you downloaded, and click “Import”
- Right-click on “OpenVPN-GUI” again, and select “Connect”
If the VPN works, this page should work:
VPN connection on Mac OSX
Download and install Tunnelblick:
After double clicking on the client certificate, it install the config for you. And the setup will be done. Now if you click on the tunnelblick icon in the OSX top bar. You can connect to the VPN. If the VPN work this page should work:
Configure GNS3 in order to use the new server
You have two ways to use your new server:
For both methods, if you use the VPN, the host of your GNS3 server will be 172.16.253.1