How to use Web Wireshark
Web Wireshark lets you analyze network packets directly in your browser. You do not need to install Wireshark software. It uses xpra technology inside a Docker container to give you the full Wireshark graphical interface. It supports real-time capture and deep packet inspection.
Installation Prerequisites
As shown in the figure below, select Web Wireshark in the GNS3 VM interface, then select the OK button and press Enter. The system will first try to pull the gns3/web-wireshark:latest container from Docker Hub.
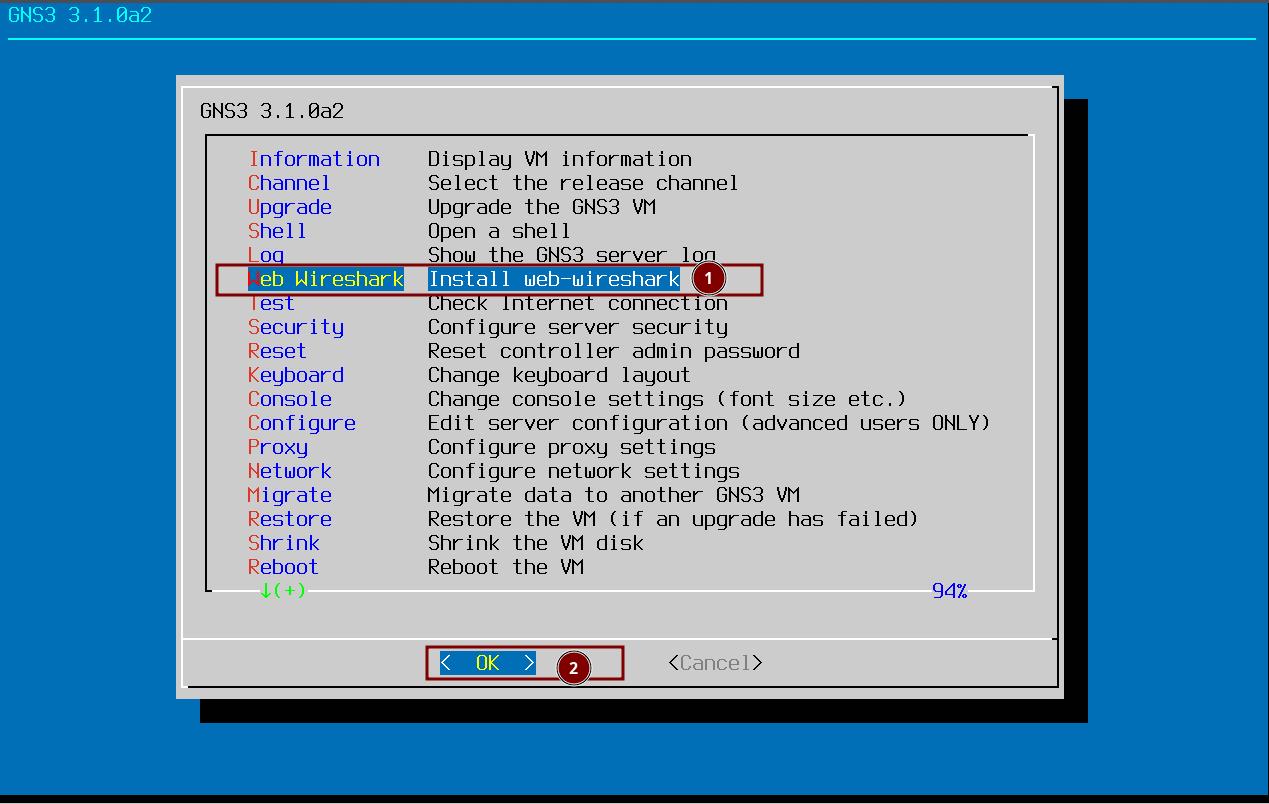
If the pull from Docker Hub fails, it will try to build the gns3/web-wireshark:latest container locally. During the build process, it needs to pull the Debian 13 base image from Docker Hub, and the subsequent software package installation will automatically switch to the Alibaba Cloud mirror source.
Using Web Wireshark
Step 1: Start Capture
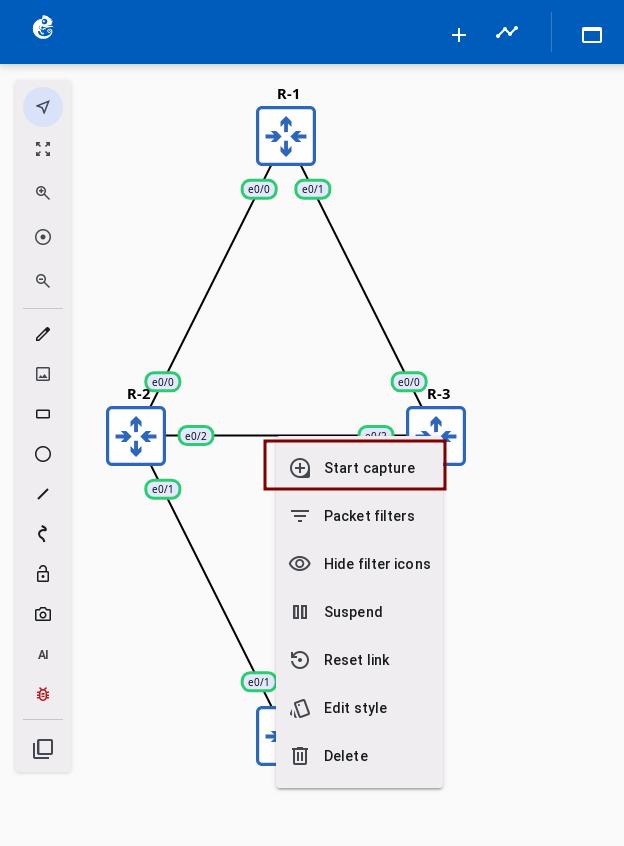
Start the network devices you want to capture in the project topology, then right-click on a link and select "Start capture".
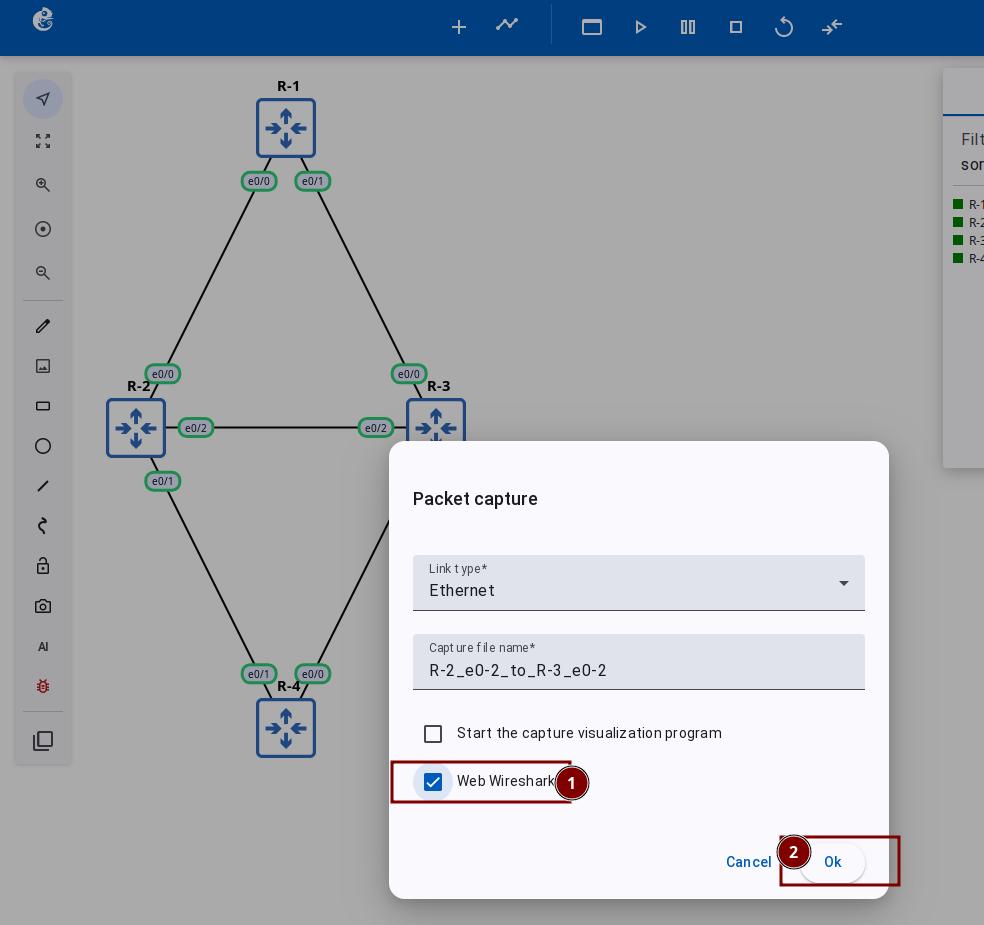
In the "Packet capture" dialog, check the "Web Wireshark" option and click OK.
Wait 3-6 seconds for the system to automatically start the Web Wireshark container.
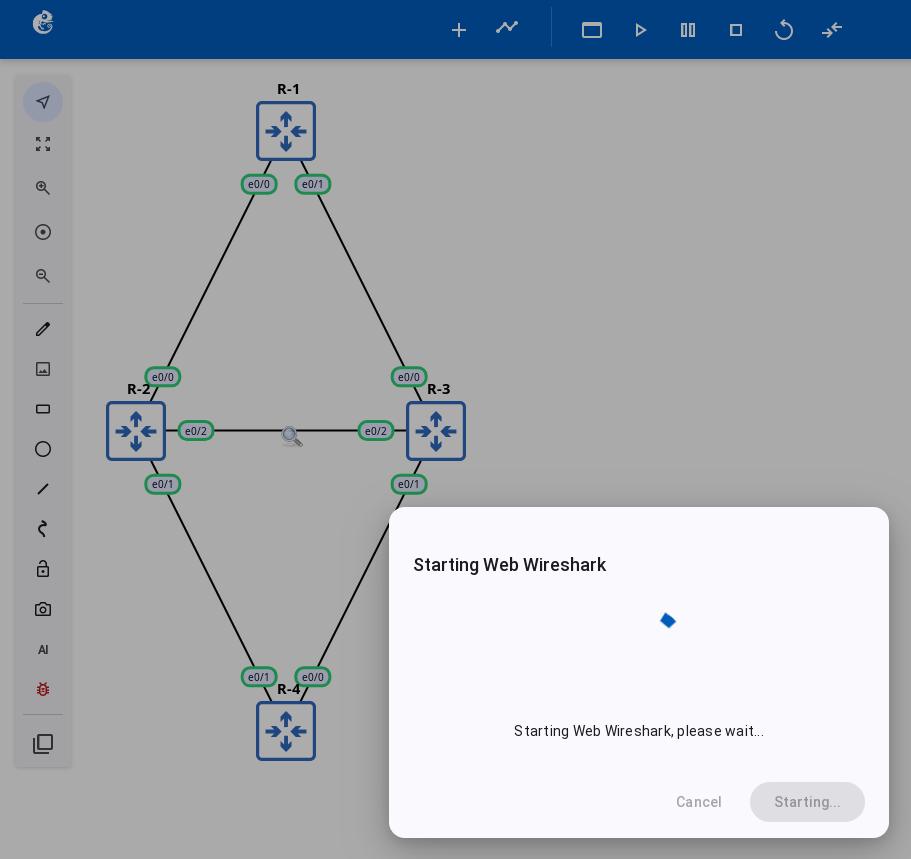
Once started, a capture icon appears in the middle of the link.
Step 2: Open Web Wireshark
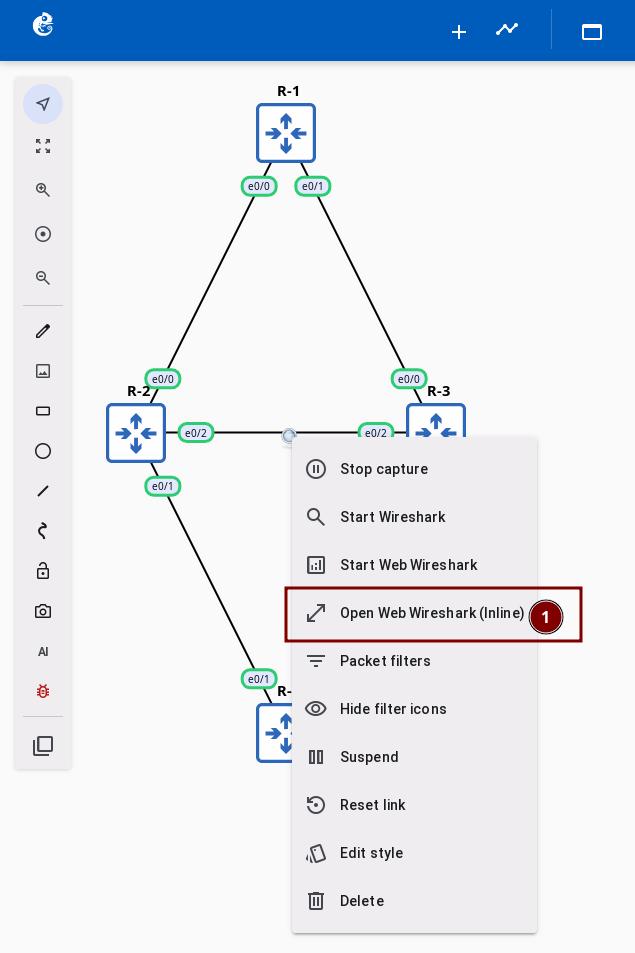
Right-click on the capture icon and select "Open Web Wireshark(Inline)".
Step 3: Analyze Packets
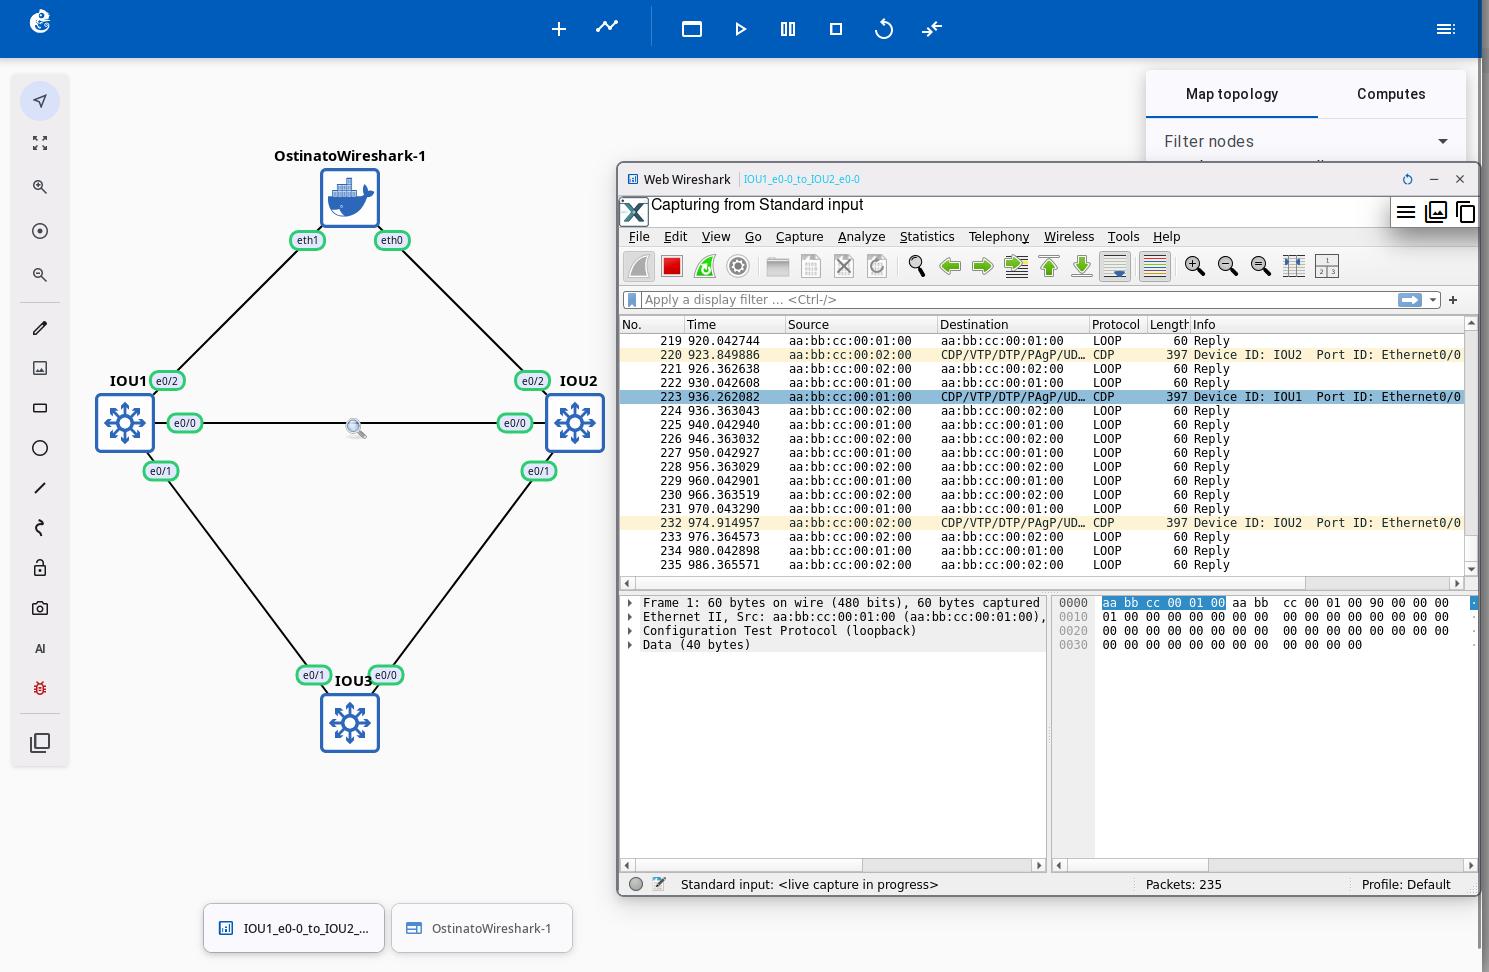
The Web Wireshark window opens as a floating window in the topology. You can drag, resize, or minimize the window.
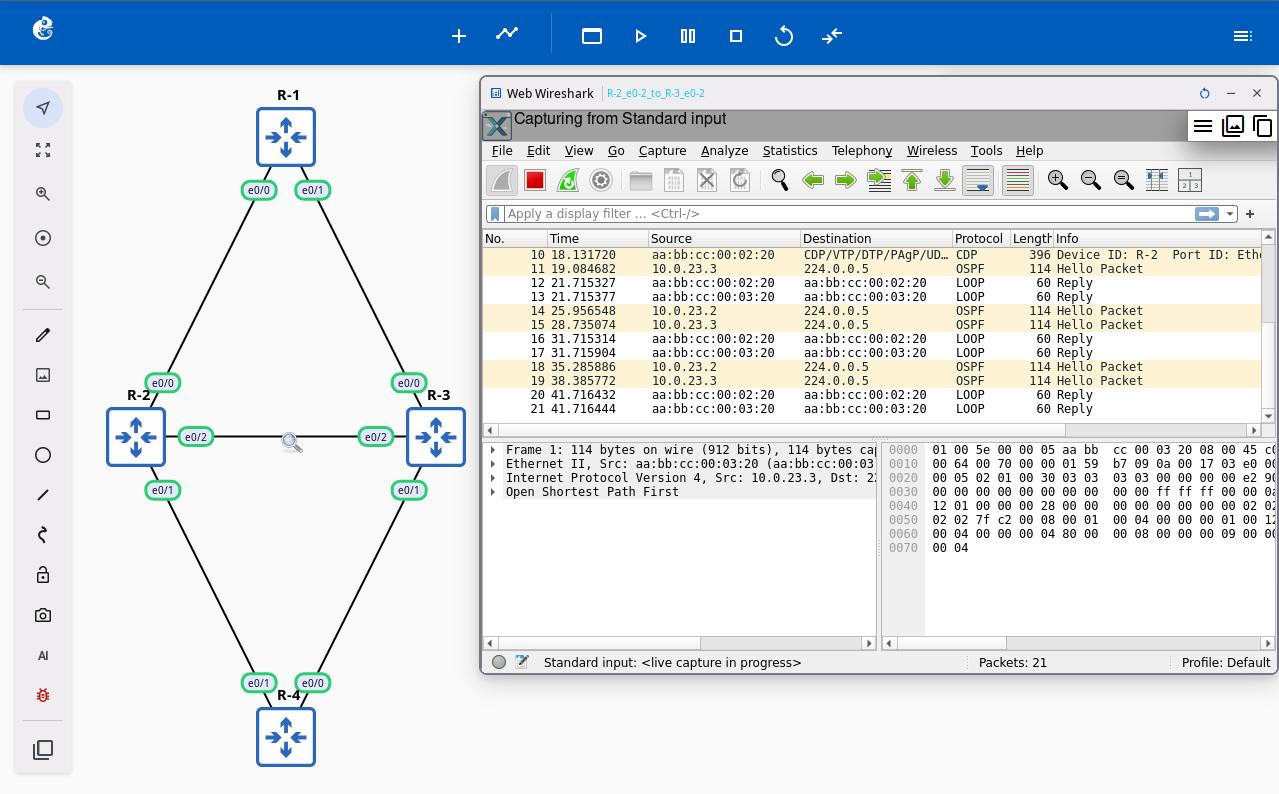
Now you can filter and analyze packets just like using desktop Wireshark.
Window limits:
- Minimum size: 800×600px
- Maximum size: 1920×1080px
- Always stays inside the browser viewport
Configuration Management
Basic Configuration
You can change Web Wireshark performance settings in the gns3_server.conf file.
Add a [WebWireshark] section to the gns3_server.conf file:
[WebWireshark]
# Enable or disable Web Wireshark
enabled = true

# Docker image name
image = gns3/web-wireshark:latest

# Docker network subnet
network_subnet = 172.31.0.0/22

# Container memory limit
memory = 2g

# CPU core allocation
cpus = 1.0

# Process limit
pids_limit = 1000
Parameter Description
| Parameter | Default | Description |
|---|---|---|
| enabled | true | Enable or disable Web Wireshark |
| image | gns3/web-wireshark:latest | Docker image name and tag |
| network_subnet | 172.31.0.0/22 | Docker network subnet (for container communication) |
| memory | 2g | Container memory limit (supports units: k, m, g) |
| cpus | 1.0 | Container CPU cores (can be a decimal, like 1.5) |
| pids_limit | 1000 | Process limit inside the container |
Network Configuration
Change the Default Network Subnet
If the default subnet conflicts with your network, you can change it:
[WebWireshark]
# Use a different subnet
network_subnet = 192.168.100.0/22
Important notes:
- Make sure the subnet does not conflict with your host network
- The subnet must be at least /22 (supports about 1000 IP addresses)
- You need to restart the GNS3 server after making changes
Configuration File Location
- GNS3 VM:
/opt/gns3/server/gns3_server.conf - Linux manual install:
~/.config/GNS3/3.1/gns3_server.conf
How to Apply Changes
- After changing the configuration file, restart the GNS3 server to apply the changes
- New containers will use the new settings
Technical Architecture
System Architecture
Web Wireshark uses a container architecture. It turns a traditional desktop application into a browser service:

Core technologies:
- Container isolation: Each project gets its own Docker container (
gns3-wireshark-{project_id}) - Virtual display: Xvfb virtual frame buffer (1920x1080x24)
- Remote display: xpra HTML5 client
- Real-time streaming: WebSocket two-way proxy
Multi-Session Mechanism
Project-Level Container
- One container per project:
gns3-wireshark-{project_id} - The container stops when the project closes and is deleted when the project is deleted
Link-Level Sessions
- One xpra session per link
- Deterministic port assignment: display = port = 10000 + hash(link_id) % 10000
- Port range: 10000-19999
Performance
- First start: about 6 seconds (includes container startup)
- Later starts: about 5 seconds (container is already running)
- Stop and clean up: about 2 seconds
Resource Configuration and Performance Tuning
Default settings:
- Container memory: 2GB
- CPU allocation: 1.0 core
- Process limit: 1000
- Network subnet: 172.31.0.0/22
Resource use for each Wireshark instance:
- Memory: 150-250 MB
- CPU: 0.5-2% (idle to active)
- Threads: about 30
Memory Configuration
Adjust memory based on how many Web Wireshark instances you use at the same time:
| Concurrent instances | Recommended memory | Description |
|---|---|---|
| 4-6 | memory = 2g | Default, medium use |
| 7-10 | memory = 4g | Heavy use |
| 10+ | memory = 8g | Large topologies |
CPU Configuration
| Use case | Recommended setting | Description |
|---|---|---|
| Occasional use | cpus = 1.0 | Default |
| Frequent use | cpus = 2.0 | Better response |
| Many instances at once | cpus = 4.0 | Dedicated server for large projects |
Reference Information
Web Wireshark vs Local Wireshark
| Feature | Web Wireshark | Local Wireshark |
|---|---|---|
| Installation | No installation needed | Needs to install Wireshark |
| How to access | Open in browser | Standalone application |
| Display location | Browser tab or inline window | Separate window |
| Cross-platform | Any modern browser | Depends on operating system |
| Remote access | Through Web UI | Needs remote desktop |
Troubleshooting
Network Connection Issues
- Check if network_subnet conflicts with existing networks
- Use
docker network lsto see existing networks - If needed, delete the old network:
docker network rm gns3-wireshark
Feature Contributor
Web Wireshark feature was developed and contributed by YueGuobin.
- LinkedIn: Guobin Yue